Wednesday, March 11, 2009

Pork and Orange Kebabs

This is the week of dinner at home. On Sunday I compiled a group of recipes and went to the store. The plan was to make enough food so that Joey and I could enjoy the meals for both dinner and lunch the next day. I spent about $50 total at the store, which I think is not so bad for 8 meals for 2.

Last night, I knew I would arrive home late so I wanted something quick and easy. I decided on Pork and Orange skewers with a side of frozen vegetables. The skewers, once threaded were to be cooked on the grill pan over two burners. The concept appealed to me and the presentation seemed outstanding. In practice, however, the kebabs were hard to make. I didn't cut the pork and oranges just so, and as a result they didn't all cook resting across the grill pan. So, after my careful threading, I embarked on some unthreading and cooked most of the pork off the skewers on the grill pan. I didn't really get the glaze concept either, so I just served the cooked skewered--some on the skewer some not (hence the picture with raw pork) with the honey mustard dipping sauce.

Pan Grilled Pork Kebabs

Ingredients:
  • 1 pork tenderloin (about 1 pound), cut into 1 1/2-inch chunks
  • 1 navel orange, cut into chunks
  • salt and pepper
  • 2 teaspoons vegetable oil
  • 1/4 cup honey
  • 1/4 cup spicy brown mustard yellow mustard
Directions:
  • Be sure the orange chunks are about the same size as the pork tenderloin chunks
  • Thread pork and orange alternating on the skewer, season with salt and pepper
  • Heat grill pan over medium heat
  • While pan is heating, mix together honey and mustard in a small bowl
  • Brush the grill pan with oil and set the skewers on the pan. Grill 4-6 minutes on each side
    • This is when I had to un-thread the skewers
  • Once they are cooked through, turn up the heat to high and brush the skewers with honey mustard and cook 2 minutes more
  • Serve immediately with excess honey mustard for dipping
Sunday, March 8, 2009

Cookies and Cream Cupcakes

We were invited to a dinner party on Saturday night and I was asked to bring dessert. At first I thought I would make something from my new cookbook. But then it seemed like a lot of the recipes required some kind of serving work--and being at someone else's house, I would rather just serve and go. Joey recommended that I make an old favorite, cookies and cream cupcakes.
One of the fun things about this recipe is that there is a half oreo on the bottom of each cupcake. It bakes right in and gives it a little extra something when you're eating it. The trick is to slice the oreos apart with a knife instead of trying to break them. It is very important to have a little cream (all the cream) on the side that you put the batter on.

This timeI crushed the oreos in a food processor and I liked the effect of really small pieces of cookie instead of large chunks throughout which happens if you use a rolling pin and ziploc bag method. I also liked how easy it was to crush the cookies. The only problem is that it made the final product more gray than I anticipated. But the taste...was outstanding.I really liked the cupcakes this time. Last time I thought they weren't complete without the frosting, this time, I liked the addition but thought it was just that.

I used about 30 oreos crushed in the batter and then used another 10 or so for the frosting. I had some leftover so I sprinkled them on top for a nice finished effect. You can check out the recipe here.

Saturday, March 7, 2009

Albondigas Soup

Joey and I got the cooking bug the other day and decided to cook for the remainder of the week. I suggested that I make Beef Vegetable soup in the crockpot. He countered with a plea for Albondigas Soup - which is a Mexican meatball soup.

Never having made this before, I scoured the internet for recipes. I finally settled on this one.The soup promised to be spicy and flavorful--and it also promised to be way too much food for two.

Generally, when a recipe is too much, I cut it down--but in this case, since it was so new to me, I didn't want to mess it up. We invited some people over--but they declined last minute, so, with all the ingredients I moved forward making the whole thing. Thank goodness it was good!

I recommend taking the serving suggestions in the recipe, none of which I followed. It would also be delicious with corn muffins (Jiffy is the only way). I made a few changes to the recipe which I will list here, but I recommend just going to the link above for the details.

Changes:
I used 8 cups of beef broth and it was plenty.
I used more than 1/4 cup of cilantro in both broth and meatballs because I despise trying to measure herbs.
I chopped the garlic, onion and cilantro in the mini-chopper that came with my hand blender--I highly recommend doing it this way!
I omitted the rice completely. (didn't miss it)
I put two 14.5 ounce cans of Rotel tomatoes in because the size was unclear
I only cooked it for an hour total because the meatballs cooked faster than I anticipated.
I could taste the hot Italian Sausage a lot in the meatballs, I recommend using something flavorful but not AS overpoweringly flavorful.
I used 6 carrots and thought more would have been nice. Adding a bell pepper or two might have also added something--probably the rice did this for the recipe creator.

I'll be eating this soup for at least a week, so come on over and have a bowl.

Friday, March 6, 2009

Cheese Puffs

For a shower/wedding gift, Joey and I received Barefoot in Paris. Ina Garten is one of my favorite food network chefs. I would gladly have her and Jeffery over for clams any day. The best part about these cookbooks (we have 2 of Ina's) are the delicious looking pictures that compliment the recipes as well as her conversational banter accompaniment in introductory paragraphs. I can almost hear her telling each little antidote.

Joey and I both looked through the book searching for recipes that interested us. His first choice was Cheese Puffs. These are little puffed dough that are flavored with cheese (you could probably surmise that from the name). I was a little worried at first because the recipe seemed difficult and time consuming, but as it turned out it wasn't really that hard at all.

The cheese puffs were very tasty. We made ours a little too big so some of them were a little to doughy on the inside but still golden brown on the out. Next time we make these, we will hopefully have received (and mastered) the use of a pastry bag and tips (a zip-top bag doesn't work for large doughs).

Cheese Puffs
from Barefoot in Paris
Ingredients:
  • 1 cup milk
  • 1/4-pound (1 stick) unsalted butter
  • 1 teaspoon kosher salt (we used iodized salt)
  • 1/8 teaspoon freshly ground black pepper (already ground pepper)
  • Pinch nutmeg
  • 1 cup all-purpose flour
  • 4 extra-large eggs (4 large eggs)
  • 1/2 cup grated Gruyere, plus extra for sprinkling
  • 1/4 cup freshly grated Parmesan
  • 1 egg beaten with 1 teaspoon water, for egg wash
Directions:

Preheat the oven to 425 degrees F. Line 2 baking sheets with parchment paper.

Grate cheeses, keeping them separated. Set these aside.

In a saucepan, heat the milk, butter, salt, pepper, and nutmeg over medium heat, until scalded. Add the flour all at once and beat it vigorously with a wooden spoon until the mixture comes together. Cook, stirring constantly, over low heat for 2 minutes. The flour will begin to coat the bottom of the pan. Dump the hot mixture into the bowl of a food processor fitted with the steel blade. Immediately add the eggs, Gruyere, and Parmesan and pulse until the eggs are incorporated and the dough is smooth and thick.

Spoon the mixture into a pastry bag fitted with a large plain round tip. Pipe in mounds 1 1/4 inches wide and 3/4-inch high onto the baking sheets. With a wet finger, lightly press down the swirl at the top of each puff. (You can also use 2 spoons to scoop out the mixture and shape the puffs with damp fingers.)** Brush the top of each puff lightly with egg wash and sprinkle with a pinch of Gruyere. Bake for 15 minutes, or until golden brown outside but still soft inside.

**The dough becomes very sticky. The two spoons and wet hand combination is harder than we thought. Ah, a pastry bag, what the life.


Spring Pig

Today was the quintessential spring day in Los Angeles. The rain cleared away the smog, the sky cleared and the crisp cold was blue and fresh. As a result, I wanted something fresh for dinner. When I want to make something quick for dinner, I check out Everyday Food's Dinner Tonight blog. Spring Pork caught my eye.

I made pork chops with parsley, garlic and lemon and a side of roasted garlic rosemary potatoes. The dinner was deliciously spring fresh and came together in just 25 minutes! For the picky eaters, serve the parsley mixture on the side.

Ingredients
5 T parsley leaves
zest + juice of 1 lemon
1 clove garlic
salt
pepper
3 Bone-in pork chops
2 T olive oil
1/2 C water

  • In a mini chopper, blend parsley, 1/2 lemon juice, all the lemon zest and 1 clove of garlic, 1/4 t salt, 1/4t pepper. Set aside.
  • Heat 2 T olive oil in an electric frying pan at 350 degrees (I guess you could just use a regular frying pan but make sure it has a lid).
  • Add pork chops and brown for 2-3 minutes per side
  • Turn heat down to 250 degrees, add 1/2 cup of water and simmer for 8-10 minutes until cooked through
  • Serve with parsley mixture

Thursday, March 5, 2009

Kitchen Gadgets - Onion Fork

As I have been building my wedding registry, I have been hard pressed to come up with numerous kitchen utensils and appliances that I love, want AND need. I fully believe that I could have one of those kitchens filled with things I never use--but then again, at least I'll have everything.

This section will cover utensils, gadgets and appliances that I think (or others might participate!) are either very useful, or alternatively, a pass.

Last June, Joey and I moved my parents things out of their rented CA apartment. We sorted through a variety of things and chose to keep some and give away others. One thing that caught my eye was my mom's onion fork. Prior to the adoption of this fork, I had a difficult time chopping onions into uniform cubes.

Everything changed when the O.F. came into my life. It holds the onion in place while you make cuts between each of its tines. Then you cut parallel lines around it and you end up with very uniform chopped onion. Perfection!

Wednesday, March 4, 2009

Sauteed Zucchini

Sauteed zucchini probably isn't a revelation for anyone else, however, it is for me. When I was growing up we sometimes had grilled steak that my dad made on the barbecue. As a special side dish my parents either sauteed mushrooms or zucchini and I loved both.

Then I moved away and discovered that I really didn't like zucchini at all--except when it was grilled. In fact, I am not a big fan of any squash family vegetable.

However, in a moment of weakness at the farmer's market last weekend, I bought 2 zucchinis. I believe my original idea for it was to make a recipe I read about in my Everyday Food magazine called "Linguine with Spring Vegetables" which combines asparagus, zucchini, and sugar snap peas in a creamy tarragon sauce. However, I didn't buy asparagus or peas so that fell through.

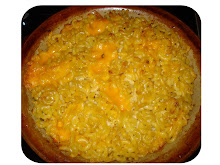
Tonight, I was making some Cheeseburger Macaroni and decided to saute some zucchini to add a little green to our meal. I recalled that my mom always used butter when she sauteed instead of oil giving the vegetable a little more flavor. The resulting zucchini was delicious--Joey even had a little! The zucchini's raw powerful bitter flavor was replaced with a slight sweetness. I think I like zucchini now!

Sauteed Zucchini for One
1 small zucchini thinly sliced into coins
2 T chopped onion
1 T butter
salt and pepper to taste

1. Heat butter in nonstick pan until melted
2. Add onion and saute until fragrant, about 2 minutes
3. Add zucchini and stir and saute about 10 minutes
4. Serve warm

Tuesday, March 3, 2009

New Product - Mini Delights

When I was in Chicago for Valentine's Day, I bought a Betty Crocker Molten Chocolate Cake Mini Delight. It is a little chocolate cake that is warm and ready to eat in 2 minutes and 30 seconds just for one! I thought it would be a perfect treat.

I mixed the cake mix and water together and spread the fudge (in lines? impossible)

1 minute and 30 seconds later (I didn't let it sit for the full 2 minutes)

The results were mildly disappointing. The cake looked nothing like the picture--more sporadic with the fudge. The cake wasn't exactly sweet enough to me--it sort of tasted like box with fudge.

After two bites (which is practically the whole thing), I decided to add a scoop of Haagen Daas Peppermint Bark ice cream. If you know anything about Haagen Daas, you know that they have strong flavors. Once I added the the ice cream the molten cake tasted better but still not outstanding.

Next time I'll stick with regular brownies...or cake...