
This weekend my friends and I went camping in the mountains. Interested in reliving my days from camp canoe and caving field trips, I wanted to make a camp favorite Hobo dinners. A hobo dinner is nothing more than a packet of foil filled with meat and vegetables and cooked in the coals of a roaring campfire. As easy as this sounds, it is a little more advanced campfire cooking than any of us had ever done.
And it showed.
We made an executive decision before we left that we would use chunks of beef instead of ground beef. I bought some steaks and cut them up myself assuming that the stew meat would be too tough for the cooking method. I cut the meat up and stowed it in some Tupperware and it went into the cooler. The other ingredients were onions, potatoes, and carrots.
At the campsite, we assembled the foil packets out of heavy duty foil. We knew going into it we had a little bit of a problem. All the recipes I had looked for online for cooking times said that this should cook for between 30-50 minutes at 350 degrees. Our fire, unfortunately, was way hotter than 350, some thought perhaps 600! The second problem was that we didn't have coals--we had ashes and wood and a lot of fire.
We ripped off huge pieces of foil and piled together thin slices of potato, chunks of beef, baby carrots (I was ecstatic that I thought of bringing these so I wouldn't have to cut them there), and slices of onions. While the packets looked big before being cooked, they ended up a lot smaller, so make them bigger than you think.
We decided to make the packets on the grill rack above the foil because our chief camping expert was a little worried that the fire would destroy the foil. We set them out and then we forgot when we put them on. This was probably our second disadvantage. Most of the packets cooked a little too long on the hot hot heat and were charred when removed from the heat. Luckily, mine wasn't charred in the least because it was too far to the side of the fire and didn't cook on the direct heat. Lesson learned.
The resulting hobo dinner I had was delicious but a little bland. At camp, the hobo dinners were made with ketchup and mustard inside the foil. We probably also had salt and pepper. Unfortunately, on this camping trip our only condiment available was mustard. Everyone agreed that the foil dinners would have been delicious if only....
The fire hadn't been so hot
We hadn't cooked them so long
We had salt and pepper or other seasonings
We had ketchup
The potatoes were cut a little thicker
So make note, when you go camping and make the foil dinners, don't forget the seasonings! In the below recipe, I am increasing the amounts to make four adult sized hobo dinners--something I should have thought of prior to camping.
Hobo Dinners
Ingredients:
Ground beef or 4 steaks cut into chunks
1-2 large potatoes (I used yellow long potatoes so I wouldn't have to peel them, but you could use baking)
1 brown or yellow onion
1 bag baby carrots
Salt
Pepper
Seasonings (opt.) (maybe Italian seasonings, or Lawrys season salt, or whatever your favorite combination is)
Ketchup (opt.)
Mustard (opt.)
Heavy duty Aluminum Foil
Directions:
1. Cut the meat into chunks and set aside.
2. Cut the potatoes into 1/4 inch thick rounds, you could do chunks but it might take longer to cook
3. Remove the papery skin of the onion. Cut in half and into moon shaped slices.
4. Make 4 large pieces of aluminum foil, double layered.
5. Assemble dinners by layering meat, potatoes, carrots, and onion in the foil packets
6. Season liberally with salt and pepper and other seasonings if applicable. Add ketchup and mustard for a twist.
7. Cook on the grill over a piping hot fire for 10 minutes. Check a packet for tender potatoes and cooked-through meat. Add more time if necessary.
Packets can also be cooked in a 350 degree oven for 30 minutes (but check it before, we learned that timing can be off).
Serve packets right out of the foil with extra ketchup and mustard.
Monday, June 30, 2008
Sunday, June 29, 2008
Salsa
This is my favorite salsa. I am not a tomato fan, so, I don't like big chunks in my salsa. I got this recipe from Consuela, the cook in the Bistro where I used to work. Everyone was always so excited when it was "Tostados" day & I always got extra Salsa. A couple of things that I love about this recipe a) it is such a good one to cook with (I have used when I make Tostados & Flutes) b) it is only 5 ingredients c) very simple to make.
Recipe:
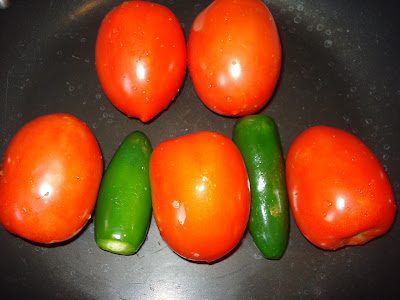
5 Roma Tomatoes
1-2 Jalapeno Peppers (if you don't like spicy, I would only go with one)
1/2 white onion (chopped)
1/2 cup - 1 cup cilantro (you can adjust amount to your likeness)
Salt to taste
Place tomatoes & peppers in non stick skillet (medium heat). The only thing I do to prepare them is wash & cut the stems off the jalapenos.
 Goal here is to get them soft. Keep flipping them every couple of minutes. They will blacken & that is absolutely fine. (Consuela said that you can also do this on the grill, I have never tried)
 Once they are soft place all ingredients in blender (chopped onion, cilantro, tomatoes, jalepeno). Blend.

Here is your end result. Salt to taste & enjoy!

*This recipe you have to adjust to your likeness of the ingredients. When Consuela gave me this recipe it wasn't exact measurements.
Recipe:
5 Roma Tomatoes
1-2 Jalapeno Peppers (if you don't like spicy, I would only go with one)
1/2 white onion (chopped)
1/2 cup - 1 cup cilantro (you can adjust amount to your likeness)
Salt to taste
Place tomatoes & peppers in non stick skillet (medium heat). The only thing I do to prepare them is wash & cut the stems off the jalapenos.
 Goal here is to get them soft. Keep flipping them every couple of minutes. They will blacken & that is absolutely fine. (Consuela said that you can also do this on the grill, I have never tried)
 Once they are soft place all ingredients in blender (chopped onion, cilantro, tomatoes, jalepeno). Blend.
Here is your end result. Salt to taste & enjoy!

Tuesday, June 24, 2008
Grandma Lorene's Chewy Chocolate Cookies or Lakeside Ice Cream Sandwich Cookies

On hot, humid Wisconsin days at our grandparents' summer home, after trudging up the steep hill after a swim in the lake with Grandpa, Grandma always had a tin of these cookies awaiting us at the top. For a refreshing summer treat, she'd serve them with a small scoop of vanilla ice cream between two cookies, creating an ice cream sandwich.
Grandma Lorene's Chewy Chocolate Cookies
1 1/4 C. butter or margarine
2 C. sugar
2 eggs
2 t. vanilla
2 C. unsifted flour
3/4 C. Hershey's Cocoa
1 t. baking soda
1/2 t. salt
1 C. chopped pecans or walnuts
Preheat oven to 350. Combine flour, cocoa, baking soda, and salt. Set aside.
Cream butter and sugar; add eggs and vanilla and mix well. Blend dry ingredients into butter mixture. Stir in nuts.


Drop by teaspoonfuls on an ungreased cookie sheet. Bake for 10-12 minutes (they will be airy and puffy and not look done), let cool for 1 minunte (they will become flatter) before removing to wire rack. Don't overbake, as these cookies should have a chewy texture after cooling. I like to freeze these right away, but you can also put a slice of bread in the tin to keep them soft.

These cookies are delicious served with vanilla ice cream between two cookies.

Or you can just enjoy them with a cool glass of milk . . .

Monday, June 23, 2008
Why Mac & Cheese & More?

This Mac & Cheese recipe was passed down to us by our Mother/Grandmother, Beverly. As long as I can remember Mac & Cheese always had a reserved space at the farm table we would all gather at to eat. It was the favorite dish of all & one of those things that you knew if you didn't help yourself to a generous scoop, you would be sorry, because, when you would go back for seconds it would be too late!
Here is the recipe:
Macaroni & Cheese
3 cups elbow macaroni
1 tsp salad oil
1 egg beaten in bottom of measuring cup and add milk to make 1 1/2 cups
3/4 lb cheddar cheese (sharp) cut into small pieces
Add macaroni to boiling water along with salad oil. Cook until al dente. Drain.
Mix macaroni, egg/milk mixture and cheese in a greased casserole, reserving a bit of the cheese to sprinkle on top.
Bake at 350 degrees for 30 minutes or until knife comes out clean.
**When there was left over mac and cheese, Grandma Bev much preferred reheating in a skillet with a little butter – she would break it up into relatively small pieces and just fry it up. Or you can throw in the microwave.
Subscribe to:
Posts (Atom)
