Showing posts with label chocolate. Show all posts

Tuesday, August 25, 2015

Mug Brownie with Salted Caramel Ice Cream and Chocolate Espresso Drizzle


Sometimes you just want a brownie but you don't want to eat the entire pan and you want it in 3 minutes or less. THIS is your brownie!

I used No. 2 Pencil's recipe but since I used chocolate chips I didn't get the chocolate chunks they had.

I used this ice cream.

I used some of our 'chocolate espresso ripple' from our tiramisu ice cream. It is fantastic! We have been keeping it in one of those condiment containers so it comes out easily in a drizzle. Makes it look pretty fancy!

Hungry?

Thursday, December 25, 2014

Best Hot Chocolate

You know how I always re-blog recipes I see and make because I'm paranoid that something I love will suddenly go off the internet? WELL that happened this morning for Hot Chocolate and the recipe was nowhere to be found elsewhere. What a shame.  I decided to just guess and the results were delicious.  Here are my approximations:


.74 oz Chocolate appeals 65% chocolate (Can be found at Sprouts)
1/4 C chopped 85% chocolate
4 C whole milk
2 C heavy cream
1 t vanilla
2/3 C milk powder

Directions
1. Pour milk and cream into a pot and bring to a boil. Watch closely so it doesn't boil over.
2. Add chocolates and vanilla and let melt, stirring
3. Add vanilla and milk powder and bring to a boil a second time.
4. Stir and serve
A skin might form but it doesn't impede the flavor

Yield 10 Cups (But our mugs are bigger so this served 4 + 2 refills)

Saturday, September 29, 2012

Chocolate Dulce de Leche Bars

Several years ago, one of my coworkers brought in Chocolate Dulce de Leche bars for her birthday. I had one and have remembered the rich and delicious flavor ever since.  This past weekend, I had reason to make dessert and decided to make the bars I'd been thinking about for years.  After mixing up the dough I realized  that there was not enough to share with upwards of 30 people so I quickly made moves to double the recipe. I didn't really double it per-se, because I didn't exactly have the topping ingredients for doubling--just the crust. I made enough fro a 9x13 pan + a smaller pan--I used a 9x9 cake pan but the amount of crust I had left was not enough, so maybe a smaller pan would work better.

I forgot to take pictures, but they were well liked at the party and all eaten over the rest of the weekend.  I think they may have benefited from a light sprinkling of finishing salt on the top. But I didn't think of that until I was at the party.

These bars actually traveled quite well and lasted out of the refrigerator for a couple of hours before serving. They may be even more delicious chilled but I didn't feel the need to cram them in the hostess' fridge.

This is the measurements I used, adapted from Epicurious:

Ingredients:

For shortbread crust:
  • 2 stick unsalted butter, softened
  • 2/3 cup packed light brown sugar
  • 1 teaspoon pure vanilla extract
  • 1 teaspoon salt
  • 2 cup all-purpose flour

For chocolate dulce de leche:
  • 1 cup heavy cream
  • 2/3 cup whole milk
  • 14 oz dulce de leche (this is the size of the can)
  • 7 large egg yolks
  • 8 ounces 60%-cacao bittersweet chocolate, I used chocolate chips

Directions:
Make shortbread crust: 
Preheat oven to 375°F with rack in middle. Butter a shallow 9- to 9 1/2-inch square baking pan (1 to 1 1/2 inches deep). Line bottom and 2 sides with parchment paper, leaving an overhang. Butter parchment.
Blend together butter, brown sugar, vanilla, and salt in a bowl with a fork. Sift in flour and blend with fork until a soft dough forms.
Spread dough evenly in baking pan using an offset spatula or back of a spoon, then prick all over with fork.
Bake until golden, 15 to 20 minutes, then cool completely in pan on a rack, about 30 minutes.
Make chocolate dulce de leche
Bring cream and dulce de leche to a simmer in a small heavy saucepan, stirring with a wooden spoon until dulce de leche has dissolved.
Whisk together yolks in a bowl, then slowly whisk in hot cream mixture. Return to pan and cook over medium heat, stirring constantly, until pan is visible in tracks of spoon and mixture registers 170°F on an instant-read thermometer. Remove from heat and whisk in chocolate until melted.
Make bars:
Pour chocolate mixture over cooled shortbread and chill, uncovered, until cold and set, about 2 hours.
Run a small knife around edges to loosen, then transfer to a cutting board using parchment. Cut with a hot clean knife (dip in hot water and wipe clean between cuts) into 24 bars. Chill until ready to serve. (these were hard to cut)

Monday, September 17, 2012

A Dinner Party - Grilled Pork Tenderloin

For the dinner party, I knew there were a few non-fish eaters in the group and I wanted to make sure to accommodate everyone. Plus, what if the salmon was terrible? I decided that the mild flavor of pork would fit with the sauce I wanted to make to go with both meats.  At Costco I got 4 pork tenderloins for a great price! This was way too much meat because the salmon was awesome.

For the pork I loosely based one marinade on Alton Brown's recipe for the ultimate grilled pork tenderloin and then I made up the other one a bit because I didn't really have enough lime juice left.

I didn't keep half the marinade since I doubled the pork and didn't double the recipe. I think it still turned out fine. I didn't want an overpowering flavor because I was making a sauce.

I think that if you had this pork without sauce it might be a little dull.

Marinate for 24 hours with this recipe.

Grill on direct heat about 12 minutes, turning every 1 1/2 minutes or until temperature reaches 145 degrees.

Let rest briefly and then slice and serve on a platter.

Sunday, March 25, 2012

Bobby Flay's Throwdown Chocolate Chip Cookies

From the moment I received the email in my inbox for 12 days of Christmas Cookies from the Food Network; I knew I had to make Bobby Flay's Throwdown Chocolate Chip Cookie recipe.

The difference in Bobby's recipe from a traditional CCC recipe is the use of a sugar called muscavado brown sugar.  According to the internet, muscavado brown sugar contains a different quantity of molasses to regular brown sugar.  Bobby uses both light and dark brown muscavado sugars in this recipe plus plain white sugar.  He also uses only 10 oz of chocolate and a mix of semi sweet and milk.

As luck would have it, William Sonoma carries muscavado sugar and they had free shipping for Christmas so I was able to get the sugars in hand immediately.  He calls for chocolate to be cut in chunks but I decided to buy chips instead.  I bought ghirradeli semi sweet (those chips are huge!) and nestle milk chocolate and then I weighed them on the scale to get 5 oz of each variety.

These cookies are worth all the trouble of getting the right sugars!  They are crispy on the edges and chewy in the middle. Despite their thin look they are everything I want a chocolate chip cookie to be.  I feel like the milk chocolate makes the cookie taste chocolatey but not too dark like semi sweet can do.  I love the texture.  Joey is a huge fan of these cookies and we're having trouble keeping our hands off them!  Perfect with a glass of milk!

Do use parchement paper, I think it makes a difference plus it keeps your cookie trays clean.  I learned a trick to just slide the parchment paper off the cookie trays and onto the cooling racks so that your cookies stay in tact and still cool effectively.

Bobby Flay's Throwdown Chocolate Chip Cookies


Ingredients

  • 2 cups plus 3 tablespoons all-purpose flour
  • 3/4 teaspoon kosher salt
  • 3/4 teaspoon baking soda
  • 2 sticks unsalted butter, at room temperature
  • 1 cup granulated sugar
  • 1/3 cup dark brown muscavado sugar
  • 1/3 cup light brown muscavado sugar
  • 2 large eggs
  • 1 1/2 teaspoons pure vanilla extract
  • One 5-ounce block semisweet chocolate, chopped into chunks, such as Callebaut
  • One 5-ounce block milk chocolate, chopped into chunks, such as Callebaut

Directions

Preheat oven to 375 degrees F. Line baking sheets with parchment or silicone pads.
Whisk together the flour, salt and baking soda in a bowl. Place the butter in the bowl of an electric stand mixer fitted with the paddle attachment and beat until smooth, about 1 minute. Add the sugars and continue mixing, scraping down the sides and bottom of the bowl until light and fluffy, about 2 minutes longer. Add the eggs, one at a time, and the vanilla extract. Add half of the flour mixture and mix until just incorporated. Add the remaining flour mixture, again mixing until just combined. Remove the bowl from the stand and fold in the chocolate chunks.
Using a small ice cream scoop, spoon the dough onto the prepared baking sheets, leaving at least 2 inches between each cookie, and bake on the middle rack until the cookies are lightly golden brown and still soft in the middle, about 11 minutes. Let the cookies rest for 2 minutes on the baking sheets before removing them to a baking rack with a wide metal spatula. Let the cookies cool on the baking rack for a few minutes before eating. Repeat with the remaining dough.

Monday, December 19, 2011

Chocolate Bread Pudding

A couple of days ago we bought some Italian bread to take to an appetizer party along with our sourdough bread snowman and chimahurri sauce.  But then just before we were about to leave we found out that there would only be 20 people in attendance and we did not need to bring too much food. So the bread was left to waste away on the counter.

A day or so later I decided the bread needed to be made. So I searched recipes for bread pudding which is what one typically does with day-old bread. I wanted to make our recipe for pumpkin bread pudding that we did for Thanksgiving Testing 2011 but I didn't have pumpkin on hand and it wasn't time for shopping.

I ended up making a variety of Chocolate Bread Pudding from a recipe on Real Simple.  I had all the ingredients but I had to cheat a little on the types of chocolate I used--I didn't have enough squares of semi sweet available. I actually skimped on the chocolate and it was still enough.  I wish that this recipe had a dash of cinnamon or something to round out the flavor.

I also skimped on the soaking time and the weighing down the bread.  I did this because I decided to make the dish at 8pm and didn't really want it around the next day.  I brought the dish to work. It was completely gone by 5pm.  I think that's a sign of either a good dish or a compelling idea that people though sounded good, tasted, and threw away.  But I'll never know!

You should make this but follow the directions for soaking.  Since I didn't I found that the middle of the bread was still white (it should be brown and covered in chocolate).  I also found chocolate crusts on the top of the bread--as though I melted chocolate, let it harden, and spread it on top.  On the other hand, the dish was still good so do whatever you want if you make it.  I think I prefer bread pudding that isn't chocolate--believe it or not.

Thursday, December 2, 2010

Chocolate Peanut Butter Bark

This month's Martha Stewart Living talked about homemade Christmas gifts. I thought I'd give the chocolate bark project a try. I didn't follow the recipe really because I wanted to make a half batch--but then I botched that and only halved the dark chocolate portion. The result was a very thin sheet of melted chocolate with a nice swirly pattern. Since I used more milk chocolate & peanut butter than chocolate that is exactly how it tastes. I like my chocolate bark a little thicker so next time I will follow the directions--and also aim for a pan similar to the size requested. I am such a rogue! Besides my mistakes, this bark is the cat's pajamas.

Chocolate Peanut Butter Bark
Ingredients
12 oz dark or bittersweet chocolate (I used Hershey's Special Dark bar)
4 oz milk chocolate (I used Nestle milk chocolate chips)
1/4 C creamy peanut butter
parchment paper
Baking spray

Directions
1. Spray 9x12 pan (I think 9x13 would be fine) with cooking spray and line with parchment paper.
2. Melt dark chocolate in a double boiler until smooth. Spread with a spatula evenly across the parchment lined pan.
3. Melt milk chocolate & peanut butter in a double boiler. Drop spoonfuls of the milk chocolate mixture onto the dark chocolate mixture and swirl with a chopstick or skewer.
4. Refrigerate 1 hour or until firm. Peel off the parchment paper and break into pieces.

Thursday, April 8, 2010

Coconut Chocolate Chip Ice Cream

I volunteered to make Easter dessert. I hemmed and hawed over it. We were having a casual Easter so I didn't want to fancy it up with something like lamb cake. I was set on making something lemony but then I had a change of heart because chocolate is oh-so-good. Then I recalled that coconut is a popular springtime flavor. I decided to make my mom's favorite ice cream flavor--coconut chocolate chip. Then I decided to top it all off with Grandma's Lakeside Sandwich Cookies. Dessert turned out to be a grand success--and the ice cream didn't even melt on the 1 1/2 drive to Ojai*!

I used the Williams-Sonoma coconut ice cream recipe and then added chocolate chips at the end. It looked at first like it was a lot of steps but it was well worth it. This is probably the creamiest ice cream I have ever eaten, ever.

Coconut Chocolate Chip Ice Cream
  • 1 1/4 cups packed sweetened flaked coconut
  • 1 1/2 cups half-and-half
  • 3/4 cup canned sweetened cream of coconut (this turned out to be the whole can for me)
  • 6 egg yolks
  • 1/3 cup sugar
  • 1 1/2 cups heavy cream
  • 3.5 oz of your favorite dark or bittersweet chocolate bar, chopped into small pieces
1. Toast coconut in a medium heavy saucepan for 7 minutes until it begins to brown. Add half & half. Bring to a simmer then remove from heat, cover and let steep 30 minutes.
2. Strain the coconut/half&half mixture and return half & half to same saucepan, discard flakes. Congratulations, you have just made coconut milk!
3. Place coconut milk over medium-high heat. Add the cream of coconut and bring to a simmer, remove from heat.
4. In a heatproof bowl whisk eggs and sugar until well blended. Add the coconut milk mixture slowly while whisking so as not to cook the eggs until well blended. Pour mixture into the same saucepan.
5. Return pan to medium-low and cook stirring slowly and continuously about 5 minutes or until custard leaves a path on the back of a spoon when scraped by a finger.
6. Pour the custard through a sieve into a bowl. Add the cream and stir well. Nestle the bowl into another bowl half-filled with ice water to cool to room temperature.
7. Cover the mixture and refrigerate until completely cold, probably a few hours
8. Freeze in an ice cream maker 20 minutes, add chocolate to the mixture in the final minute of churning. Place in freezer in a covered container.

*To make a long trip with ice cream in the car, fill gallon sized ziplocs with ice. Place ice cream container in a bonified cooler and surround with ice cube bags. Be sure all sides are padded with ice. Place the cooler in the trunk away from sunlight and internal cabin temperature shifts. Place in the freezer immediately upon arrival at destination.

Friday, January 29, 2010

Molten Chocolate Cake


I do have custard cups! And aren't they adorable? Back when I was making the wedding registry at Crate & Barrel I came up with all sorts of random kitchen items that I suddenly could not live without. I'm glad I did, I never knew how handy these little guys would be...until today. Today, I used them to make delicious and quick Molten Chocolate Cakes and I didn't even have to leave the house.

You heard me, molten chocolate cake. I've tried this before, and it is never the same deliciousness of the restaurant version. Until now. I whipped these babies up in about 10 minutes and they only take 13 minutes to cook. This is a perfect dessert if you have unexpected guests for dessert because it takes so few ingredients and turns out delicious. I cut the recipe in half from the original only making enough for two and it worked out just fine. I did not remove them from the cups to serve on a plate but they would've dropped out easily if I had. I also served them later and they weren't really warm anymore. That probably was a mistake actually. Joey's chocolate center wasn't as gooey as it should have been. So next time, I will serve them right out of the oven.

Molten Chocolate Cake for 2 (from Tasty Kitchen)
Ingredients:
* 2 pieces (squares) Semi-sweet Baking Chocolate
* ¼ cups Butter
* ½ cups Powdered Sugar
* 1 whole Egg
* 1 whole Egg Yolks
* 3 tablespoons Flour

Directions
-Preheat oven to 425. Grease 2 small ramekins or custard cups with cooking spray, set aside
-In a medium microwave safe bowl add butter and baking chocolate(broken into 4 pieces). Melt butter for 1 minute, chocolate will not be melted.
-Whisk together melted butter and chocolate until the chocolate is melted
-Add powdered sugar and stir until combined
-Add Egg and additional egg yolk and whisk until combined
-Add flour and stir until combined
-Pour batter between prepared custard cups
-Bake 13-14 minutes until edges are firm but middle is still gooey
-Serve immediately with whipped cream or ice cream

Wednesday, December 3, 2008

Whipped Hot Chocolate For Two

The Barefoot Contessa Family Meals cookbook is spectacular. I love the pictures, I love how the writing sounds just like her show, and so far, I love the food.

Last night, it was particularly cold in Southern California (like 55!). Joey and I decided to catch up on some episodes of Heroes and drink hot chocolate. I was excited to try this recipe because it would allow me to use my new immersion blender for the first time!

The hot chocolate was some of the best Joey and I have ever had. It had a flavor all to itself. The chocolate flavor powered through. It was the perfect evening treat for a cold day, and simple to make! Just increase the amounts if you want to make more, this recipe makes two generous size mugs (3 mugs with my Fiestaware ones).


Whipped Hot Chocolate for Two
Ingredients:
1 1/2 C. Whole Milk
1 C. Half and Half
2 ounces semi-sweet chocolate chips or semisweet baking squares
2 ounces milk chocolate (go for non-Hershey. I used Cadbury)
1/2 T sugar
1/2 t vanilla extract

Directions:
1. Heat the milk and half and half in a saucepan over medium-low until just before simmering (small bubbles should appear around the edges) stirring throughout to avoid the milk skin.
2. Meanwhile, roughly chop chocolates
3. Remove pan from heat and add chocolates. Stir until melted.
4. Return pan to heat. Add sugar and vanilla. Heat until desired temperature.
5. Remove from heat and whip hot chocolate with the immersion blender a couple of pulses before serving.
6. Pour into mugs and enjoy immediately! (contents of mug may be hot, use caution)

Thursday, October 9, 2008

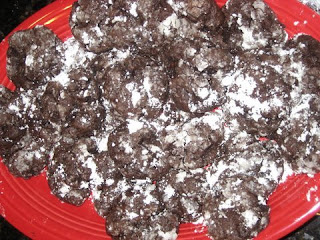
Chocolate Gooey Butter Cookies

Paula Dean always makes rich and delicious looking dishes. For the same party, I wanted to make a chocolatey dessert. I wanted to use the free box of Betty Crocker cake mix I had lying around but I didn't really want to make cake. I didn't know what to do.

I was browsing the new Food Network Site (which now has pictures! finally) and I came across this recipe for Chocolate Gooey Butter Cookies. Again, they were really easy, and a big hit! The only thing is that they take a bit of time to sit in the refrigerator because the dough is so unbelievably thick.

Chocolate Gooey Butter Cookies


Ingredients:
1 8oz bar of cream cheese (I used lowfat) at room temperature
1 stick butter, at room temperature
1 egg
1t vanilla extract
1 box pudding in the mix chocolate cake mix (I used Betty Crocker Triple Chocolate)
Confectioners sugar

Directions:
-Preheat the oven to 350 degrees
-Cream together the cream cheese and butter
-Add the egg and extract and beat until mixed
-Add cake mix and mix until just combined
-Cover and refrigerate for 2 hours
-Roll 1 T of dough into a ball and then roll in powdered sugar
-Set 2 inches apart on a cookie tray
-Bake for 12 minutes, the cookies will be moist and gooey

Eat!

Sunday, August 31, 2008

Karen's Amazing Chocolate Caramel Dessert

My friend Allison's sister Karen sent Allison a care package for her birthday back in July. In it were these amazing chocolate caramel dessert bars. Allison shared her bounty with me--I probably had eight of the delicious little morsels. I asked for the recipe straight away.

The recipe, while it looks easy--actually happened to be a little bit difficult. The problem was that I might possibly have not split the batter into two parts. Someone who has made these before recommended taking the second half of the batter and stretching it across the top with your hands because once it is down, it sticks and is impossible to move.

Karen's Amazing Chocolate Caramel Dessert

INGREDIENTS:
-1 package yellow cake mix
-2/3 C evaporated milk, divided
-1 1/2 sticks butter (melted)
-~55 caramels
-1 C chocolate chips (I used the mini ones and this turned out to be easier to spread)

DIRECTIONS:
1. Preheat oven to 350. Grease and flour the bottom of a 9x13 pan.
2. Mix yellow cake mix, melted butter, and 1/3C evaporated milk
3. Take 1/2 of the mix and cover the bottom of cake pan, spread evenly with a rubber spatula (it turns out these are mostly made with silicon now)
4. Bake for 10 minutes.
5. Meanwhile, ombine caramels and 1/3 C evaporated milk and melt in microwave until melted (~4min)
6. Pour the caramel mixture over the bottom crust.
7. Evenly sprinkle the chocolate chips over caramel.
8. Cover with remaining cake mix (this is very hard, see above notes
9. Bake an additional 15-20 minutes

Allow to cool completely before trying to cut. Once cut, nobody noticed that the top was missing. I didn't have any left by the end, they go like hotcakes.

Monday, August 11, 2008

The Taste Sensation

Last night Joey and I decided on a whim to make some cheesecake. Philedelphia cream cheese has this great interactive program on their site (the Kraft site) called the Cheesecake Customizer where you can choose exactly what you want to do and it will provide you with a recipe. Joey and I used the customizer and came up with an oven baked chocolate cheesecake with a white chocolate swirl.

We went to the store and got all the ingredients. We started mixing with the Kitchenaid mixer I have and I thought it was working, but it turns out, that for cheesecake, you should use an electric hand mixer if possible because it can get at the bottom of the mix and really bite through the thickness. We didn't know that there were un-mixed-in white chunks until we started pouring the mixture into the purchased chocolate graham cracker crust.

Knowing that over mixing after the egg is added creates cracks, we decided to pour the overly thick cream cheese mixture back into the bowl and remix. We tipped the crust over the pan and--whoopsie-daisy! The entire crust fell out of the pan into the bowl.

Totally unexpected.

We decided to do another mix and make the cheesecake anyway without the crust. This crustless cake is delicious! It is a Taste Sensation. It remindes me a little bit of cheesecake brownies. The edges got a little overcooked but the inside was delicious--I think this could easily be solved by cooking it less time (but that didn't occur to me at the time)

Ingredients:
1 Pre-made chocolate cookie crust (not oreos, but more like chocolate graham crackers)
1 8oz package cream cheese
1 8oz package neufchatel cheese (1/3 less fat cream cheese)
1/2 cup sour cream
2 eggs
3 squares (3oz) semi-sweet baking chocolate, melted
2 squares (2oz) white baking chocolate, melted
1 tsp. vanilla

Directions:
1. Preheat oven to 325° and prepare crust (take it out of the wrapper)
2. Beat cream cheese, sugar, and vanilla in a large bowl (I recommend a hand mixer) until well blended
3. Add the chocolate and sour cream until mixed together.
4. Add the eggs, one at a time and beat until JUST COMBINED to avoid cracks (only applicable if you are making real cheesecake and NOT the Taste Sensation)
5. Dump crust over bowl and beat once more until combined.
6. Evenly spread mixture into a 8-9 inch circle cake pan
7. Gently drop spoonfulls of white choclate over the batter and cut through batter with knife for a marble effect.
8. Bake 25 minutes (do less) until center is almost set
9. Cool completely, then chill for at least 4 hours.

Posted by Picasa

Thursday, July 17, 2008

Chocolate Wafer Icebox Cake - Dr. Suess Style

Back when Tastespotting was still around, I saw this delicious looking recipe for the icebox cake that is made with those Nabisco Chocolate Wafers. I passed it around to some of my friends and coworkers, and Allison insisted that I make it for her birthday in July, several months later.

Allison's birthday is on Sunday, so I decided to celebrate on Wednesday, since I had a little extra time to cook the night before.

I followed the recipe from Shutterbean's blog exactly--but I was a little nervous when I compared the whipped cream recipe with the one in my Betty Crocker cookbook. Shutterbean's big batch of whipped cream called for 4 cups of heavy whipping cream, 3 TB of Sugar, and 1 TB of Vanilla. Betty called for only 2 cups of cream and the same proportions of everything else. The bottom of the Nabisco wafer box called for 3 cups of cream and the same proportions of everything else. It was too late to call any of my usual power bakers, so I decided to stick with Shutterbean.

I made a good decision, after whipping the cream, I found it to be delightfully vanilla-y, not too sweet and a perfect compliment to the chocolate cookies. I did learn one thing while whipping the cream though, if one wafer in a box is broken, and the box is sitting on the table with the vibrating mixer, all the cookies will break.

Broken cookies, lend to a not-so-perfect cake. With images of Shutterbean's and then Smitten Kitchen's perfect cakes dancing in my head, mine just didn't quite stack up (pun intended).

Here are some do's and don'ts to keep in mind when you make this dessert, and I say when because you will want to rush out and get those $4 wafer boxes immediately and make this cake.
  1. Do whip the cream enough for soft peaks
  2. Do refrigerate the cream, and possibly even the cake every once in a while if your kitchen is over 75 degrees
  3. Do select boxes of cookies that are not broken
  4. Do not leave cookies anywhere they could get damaged
  5. Do put a dollop of whipped cream under the first layer of cookies to hold them still
  6. Do not press down on the layers when you spread whipped cream--this will cause the cookies to push out and unbalance the cake
  7. In the event of broken cookies, do use them, but try to make a cookie layer as complete as possible
  8. Do turn the cake around 180 degrees halfway to avoid leaning
The Recipe as Shown on Shutterbean's blog:

Chocolate Wafer Icebox Cake
Ingredients:
4 Cups heavy whipping cream
2 intact boxes of Nabisco chocolate wafer cookies
3T sugar
1T vanilla extract

Directions:
Combine cream, sugar and vanilla in a chilled mixing bowl and beat with electric mixer until soft peaks form. (I wasn't sure what soft peaks were, but basically it becomes thick and spreadable with a surprising fluffy lightness)
Find a flat plate--flate is VERY important, I used my cake carrying case.
Put a dollup of cream on the bottom of seven cookies and arrange them in a circle with one in the middle.
Use a rubber scoop spatula to spread a scoopfull of whipped cream onto the layer of cookies
Continue layering cookies and whipped cream, be sure to end with whipped cream.
Crush leftover cookies between fingers (I rolled broken waffers between my hands and let the crumbs slip through my fingers to decorate the top
Chill for 4-6 hours until cookies are more cakey OR cover with plastic wrap or cake cover and freeze overnight, move to fridge at least 1 hour before serving.

I froze the cake overnight, drove it to work in 70 degree weather, and then popped it in the fridge for the rest of the day. This cake was so delicious. It was creamy and cakey. It was a HUGE hit in the office and the 12 people on my team devoured the cake before they had a chance to share with any of the other 70 people in our immediate area. If you are going somewhere with a crowd of big eaters, you may consider making two cakes.

Sunday, July 6, 2008

Orange Cake

I like reading food blogs. I like to see what other people are making and imagine myself making those same things. At one time last year, I read this recipe on Foodbeam and knew it was perfect for me. The yogurt cake needs nothing but one bowl and a wooden spoon (limited dishes) and just a few simple ingredients to make a delicious cake.

When I made the cake the first time I stuck to grapefruit and while it didn't look nearly as wonderful as Fanny's, it tasted delicious. This weekend, I decided to make the cake again but deviate from the grapefruit and use orange. I also thought that since it was the 4th of July, I should make two cakes--one chocolate and one white with a common theme of orange throughout. That way, it would be criss-crossed along a red plate and look sort of patriotic.

I cheated on the chocolate cake. I used the box mix, I think it was Betty Crocker. I almost replaced the oil with applesauce, and I almost used the super secret ingredient. But in the end, I just went with the basic box recipe with the addition of orange zest for a refreshing twist. When I was taking the orange out of the refrigerator, I saw the chocolate chips, so I thought, this too!

It turns out that chocolate chips sink to the bottom when baked in a chocolate cake. However, this ended up being a good thing and the cake had a light fudgey bottom layer.

I followed Fanny of Foodbeam's recipe for the yogurt cake exactly except I replaced the grapefruit zest with orange zest and I didn't use the juice glaze on the top.. I also made the cake in an 8x8 square glass pan. (I have made it in a regular circular cake pan before and I like it better because the cake is thinner.

For the glaze, I used the Betty Crocker Cookbook recipe for Vanilla Glaze and replaced the vanilla with orange zest. The recipe doesn't specifically say to leave the pan on the heat the whole time, but that seemed to be the only way it worked. I poured the same glaze on both cakes and had a little bit leftover--but the resulting look was a little messy.

Chocolate Orange Cake with Orange Glaze
Ingredients:
For Cake:
1 box chocolate cake mix (and whatever it needs to make it)
zest of 1 Med. Orange
1 Tb zest (add.)
6 oz. semi-sweet chocolate chips
For Glaze:
5 1/3 TB butter
2 C. powdered sugar
1-2 TB fresh squeezed orange juice
1 TB orange zest

Directions:
1. Make cake batter as suggested
2. In the last 30 seconds of the 2 minute mix, add orange zest and chocolate chips.
3. Bake as directed, cool completely.
4. Meanwhile, melt butter in a 1 1/2 qt. saucepan over low heat
5. When butter is melted, slowly add powdered sugar until dissolved.
6. Add orange zest to mixture
7. Add a little bit of orange juice until thickened and mixture is pourable
8. Drizzle mixture over cake for desired effect, glaze thickens as it dries.

Tuesday, June 24, 2008

Grandma Lorene's Chewy Chocolate Cookies or Lakeside Ice Cream Sandwich Cookies


On hot, humid Wisconsin days at our grandparents' summer home, after trudging up the steep hill after a swim in the lake with Grandpa, Grandma always had a tin of these cookies awaiting us at the top. For a refreshing summer treat, she'd serve them with a small scoop of vanilla ice cream between two cookies, creating an ice cream sandwich.

Grandma Lorene's Chewy Chocolate Cookies

1 1/4 C. butter or margarine
2 C. sugar
2 eggs
2 t. vanilla

2 C. unsifted flour
3/4 C. Hershey's Cocoa
1 t. baking soda
1/2 t. salt

1 C. chopped pecans or walnuts
Preheat oven to 350. Combine flour, cocoa, baking soda, and salt. Set aside.

Cream butter and sugar; add eggs and vanilla and mix well. Blend dry ingredients into butter mixture. Stir in nuts.
Drop by teaspoonfuls on an ungreased cookie sheet. Bake for 10-12 minutes (they will be airy and puffy and not look done), let cool for 1 minunte (they will become flatter) before removing to wire rack. Don't overbake, as these cookies should have a chewy texture after cooling. I like to freeze these right away, but you can also put a slice of bread in the tin to keep them soft.

These cookies are delicious served with vanilla ice cream between two cookies.

Or you can just enjoy them with a cool glass of milk . . .