Showing posts with label cookies. Show all posts

Wednesday, April 12, 2017

CJ'S Chewy Chocolate Dream cookies.

Have you been craving the perfect chocolate cookie lately? Well, these cookies are bound to satisfy you. Eat them right out of the oven, frozen, plain, or in a bowl of ice cream. Whatever way you eat them, there is no hiding the incredible taste and flavor of these delicious chocolate cookies.


                                CJ's Chewy Chocolate Dream Cookies

1/2 cup Brown Sugar
1/2 cup White Sugar
1/2 cup Butter
1 Egg
1/2 teaspoon Vanilla
1 cup Flour
1/2 teaspoon Salt
1/2 teaspoon Baking Soda
2/3 cup chocolate chips (for melting)
1/2 cup chocolate chips ( If you want a crunch. If you don't want that, make it just 1 cup of chocolate chips.)

Preheat oven to 350 F
Cream in electric mixer butter, and both kinds of sugar. Add egg, mixing until combined, then put in vanilla. In a separate bowl, combine flour, baking soda, and salt. Very slowly, add the flour mix to the wet mix, and combine. Put a pot of water on to boil, then find a heatproof glass bowl (or use a double boiler). When the water is boiling, put the glass bowl on top of the pot and pour the 2/3 cup chocolate chips into the glass bowl. Stir until melted. After they are melted like this:
turn the stove off, and spoon the now melted chocolate chips into the mixer fast, so they don't harden. Turn the mixer on, and mix until combined. Mix in the rest of the chocolate chips. If you wish to add nuts, add a couple handfuls of chopped walnuts. Put onto trays:


 and bake for first 8 minutes, then if they do not look done enough, bake for a minute more, and repeat until done. Serve as desired. Enjoy!
 

Sunday, March 25, 2012

Bobby Flay's Throwdown Chocolate Chip Cookies

From the moment I received the email in my inbox for 12 days of Christmas Cookies from the Food Network; I knew I had to make Bobby Flay's Throwdown Chocolate Chip Cookie recipe.

The difference in Bobby's recipe from a traditional CCC recipe is the use of a sugar called muscavado brown sugar.  According to the internet, muscavado brown sugar contains a different quantity of molasses to regular brown sugar.  Bobby uses both light and dark brown muscavado sugars in this recipe plus plain white sugar.  He also uses only 10 oz of chocolate and a mix of semi sweet and milk.

As luck would have it, William Sonoma carries muscavado sugar and they had free shipping for Christmas so I was able to get the sugars in hand immediately.  He calls for chocolate to be cut in chunks but I decided to buy chips instead.  I bought ghirradeli semi sweet (those chips are huge!) and nestle milk chocolate and then I weighed them on the scale to get 5 oz of each variety.

These cookies are worth all the trouble of getting the right sugars!  They are crispy on the edges and chewy in the middle. Despite their thin look they are everything I want a chocolate chip cookie to be.  I feel like the milk chocolate makes the cookie taste chocolatey but not too dark like semi sweet can do.  I love the texture.  Joey is a huge fan of these cookies and we're having trouble keeping our hands off them!  Perfect with a glass of milk!

Do use parchement paper, I think it makes a difference plus it keeps your cookie trays clean.  I learned a trick to just slide the parchment paper off the cookie trays and onto the cooling racks so that your cookies stay in tact and still cool effectively.

Bobby Flay's Throwdown Chocolate Chip Cookies


Ingredients

  • 2 cups plus 3 tablespoons all-purpose flour
  • 3/4 teaspoon kosher salt
  • 3/4 teaspoon baking soda
  • 2 sticks unsalted butter, at room temperature
  • 1 cup granulated sugar
  • 1/3 cup dark brown muscavado sugar
  • 1/3 cup light brown muscavado sugar
  • 2 large eggs
  • 1 1/2 teaspoons pure vanilla extract
  • One 5-ounce block semisweet chocolate, chopped into chunks, such as Callebaut
  • One 5-ounce block milk chocolate, chopped into chunks, such as Callebaut

Directions

Preheat oven to 375 degrees F. Line baking sheets with parchment or silicone pads.
Whisk together the flour, salt and baking soda in a bowl. Place the butter in the bowl of an electric stand mixer fitted with the paddle attachment and beat until smooth, about 1 minute. Add the sugars and continue mixing, scraping down the sides and bottom of the bowl until light and fluffy, about 2 minutes longer. Add the eggs, one at a time, and the vanilla extract. Add half of the flour mixture and mix until just incorporated. Add the remaining flour mixture, again mixing until just combined. Remove the bowl from the stand and fold in the chocolate chunks.
Using a small ice cream scoop, spoon the dough onto the prepared baking sheets, leaving at least 2 inches between each cookie, and bake on the middle rack until the cookies are lightly golden brown and still soft in the middle, about 11 minutes. Let the cookies rest for 2 minutes on the baking sheets before removing them to a baking rack with a wide metal spatula. Let the cookies cool on the baking rack for a few minutes before eating. Repeat with the remaining dough.

Sunday, February 19, 2012

Rubber Stamps, Chocolate, Sprinkles & Cookies

On Friday evening I did a bit of a cookie experiment. I really planned to make these cookies for Valentine's day after having an epiphany about it as a combination of piniterest and a very long line at Michael's.  The idea was to use rubber stamps to create designs in cookies.  I figured it would work the same as any cookie mold and plus there were a bunch of valentine's themed rubber stamps for sale in the line.  I bought two.

I then didn't have any time to make anything around Valentine's day and put the idea aside--but I had purchased some sugar cookie dough for the project so I knew it had to happen at one time or another.

I would like to let everyone know that I didn't watch or read anything to do with the Pioneer Woman before making these cookies. This is all my idea and she obviously copied me! ;) Or we both had an excess of colored sprinkles available due to making unicorn poop.

So anyway, my original idea was this: stamp cookies, bake and then dip thick cookie edges in pink or purple frosting and roll them in sprinkles. However, being Friday night, I wasn't actually interested in making frosting--it sounded messy.  It also sounded like a whole lot of powdered sugar.  Instead, I decided I could use some chocolate, which I happened to have, and melt it with a bit of butter.

The actual output of this project was not as great as expected.  The first part of my method was to cut thick slices of cookie from a roll of store-brand sugar cookie dough. Then, I pressed the stamps into the center of the cookies which made for thick edges that cracked and, quite honestly, hardly any stamps in the center of the cookie but more off to the side.  I threw the tray of cookies in the oven and when I pulled them out 7 minutes later the designs were barely there--the cookies spread into regular sized cookies.  So, I pulled the tray out of the oven and pressed the stamps hard into the middle and then baked the cookies for an additional minute. It worked!

I think that the resulting cookie has a bit of a texture surprise.  The cookies are only soft in the middle part where they were stamped and crunchy on the edges.  The sprinkles look awesome but they are also a little crunchy so these cookies are all about the crunch. Also, store-brand sugar cookie dough is a bit boring. Note to self.  But! These cookies are otherwise a success! I might actually try it again but with different sprinkles--that sugary kind that come in stars and dolphin shapes.  I also would make my own dough or at least use pillsbury.

Rubber Stamp Chocolate Sprinkled Cookies
Ingredients:
Never-used with ink, clean rubber stamps of any design
1 roll sugar cookie dough (I actually only made half the roll because this recipe was a gamble)
2-3 oz dark chocolate
1 T butter
Sprinkles
2 shallow bowls

1. Preheat the oven according to dough directions.
2. Slice thick rounds of dough onto a baking sheet
3. Bake 7 minutes and then pull the sheet out of the oven.  Stamp the hot cookies without touching the hot cookie sheet by pressing the stamp into the middle of the cookies--start more to the edge than you think so the middle of the stamp actually gets in the middle of the cookie.
4. Bake 1 minute more or until golden brown
5. Let cool completely
6. Melt chocolate with a bit of butter (up to 1 T) and stir to melt completely (I did a few seconds in the microwave and then mixed to get it to melt smoothly).
7. Pour sprinkles into another shallow bowl.
8. Spread a sheet of parchment or wax paper on the counter so that you don't get sprinkles and chocolate everywhere from the cooling cookies.
9. Pick up a cookie by the edges and dip the non-stamped side into the chocolate, spread evenly with a knife
10. Dip the chocolate side of the cookie into the sprinkles and move it around a bit to coat the entire bottom. Lay the cookie chocolate side up on the parchment and repeat until all cookies have been coated.
11. Let the chocolate dry for several hours or overnight.  Once dried, the chocolate will be a little bit hard and hold the sprinkles without being messy.  Enjoy!

Sunday, January 29, 2012

Somebody stepped in the Unicorn Poop


My friend Robin challenged me to make Unicorn Poop for her birthday.  I at first thought it was a ridiculous wish and I would not be doing it.  But then I decided that it actually didn't seem that hard...and I could do it.

The recipe for unicorn poop is on Instructables. Haven't you read the book Everybody Poops and asked, but what about unicorns?

Well it turns out unicorns do poop after all! And their poop is unlike any other animal! It is rainbow colored, sparkly, shiny and filled with stars and bears and dinosaurs. It's true, I've seen it with my own eyes!

The problem with my unicorn poop is that sometime between putting the pointed swirls in the oven and taking them out someone snuck in and stepped in the poop! The resulting piles were flattened and only resembled piles--not piles fresh from the animal.  Flattened! The nerve of some people or elves or whomever stepped on these piles!

Making these cookies was actually rather easy--just lots and lots of hands on time and a lot of time in general. So leave time!

I used the sugar cookie recipe on the instructables page but I think any roll-out sugar cookie dough should work for you.  Also the recipe only makes 30 tiny and 5 gigantic cookies which isn't too many if you're going to go to all the trouble to make them in the first place. I recommend making a bigger cookie recipe.

After mixing the dough, you must put in the food coloring. I used the gel food coloring which I have used before but I bet it would be easier with the liquid variety although I don't know if you would have such vibrant colors!  To use the gel kind break your dough into 6 balls and dip a toothpick into the color and then rub the toothpick onto one dough ball. Next, massage the color in with your hands. Beware! The color will get all over your hands and under your nails so you may want to consider wearing gloves at this point. Although, if you have nothing important going on the week following you can embrace the rainbowy hands. Honestly it goes away if you wash your hands a thousand times like you have to do with this recipe.

Once each color is mixed into the ball of dough, break those balls up into several small balls--the size of the shooter marble in marbles and then put each group of marbles into ziploc bags.

In order to not have the snakes dry out or get too soft it was best to roll one snake in it's entirety and get it into spiral poo pile at once and then throw it on a baking sheet in the fridge.

Directions
1. Make sugar cookie dough according to directions
2. Split dough into six balls and rub with rainbow food coloring (I used red, lemon yellow, kelly green, teal, royal blue and purple. On afterthought I wish I used pink or another yellow instead of teal & blue but maybe they are perfect anyway).
3. Split your new color balls into 12 or so marble shooters and chill in ziplocs by rainbow if possible but one color at a time is fine. I actually stored mine in bowls since I already had them out but if your fridge isn't totally empty that could prove impossible. Chill dough for at least an hour
4. Lay a large silicon baking mat on your counter and dust very lightly with flour. Dust your hands a bit too but try to get all excess off
5. Take out 6 rainbow balls and roll them out into snakes carefully. Lie each snake next to another color and press together lightly. Once all snakes are rolled roll the snake pile into one large snake of spiral colors by twisting a little.  Note - Cookie dough is not as strong as playdough
6. Twist your spiral into a pile and pinch the ends. They will flatten in the oven so try all the methods you can think of to get them to stay in piles. At the very least make exaggerated spirals so you can see something when flattened. I put a few bears and dinosaurs (the sprinkled candy kind) on some of the cookies just for fun.
7. Place each pile on a cookie tray in the fridge until you have a full tray to bake. Preheat the oven according to the directions.
8. Bake and let cool on wire racks
9. Once cooled, spread the sparkly gel on top of the cookies with a silicon brush or spatula
10. Then sprinkle with sugar stars and make sure they stick
11. Next take the edible glitter and sprinkle across the cookie. If you get a clump of glitter, just knock it onto another cookie with a good shake. If you want to omit the glitter you totally can because the gel stuff is glittery by itself.

These cookies taste good too and if you just want to make rainbow sugar cookies you can follow the same steps but definitely add the stars!

Friday, December 31, 2010

Product Review: Trader Joe's Sugar Cookie Workshop

I stopped at Trader Joe's in search of macadamia nuts and came out with this Sugar Cookie Workshop--for 99 cents! I bought the Sugar Cookie Workshop because it was such a ridiculously good deal. By that time, I had already baked my socks off but I figured I'd have a chance to do these before the new year.

And I did that in the nick of time! This workshop really is a good deal. For 99 cents, I got sugar cookie mix, 3 cookie cutters, 2 packets of vanilla frosting and 4 different colors of sanding sugar. If you wanted to buy all these things separately, it would be well over $10. The mix for me yielded about 60 cookies. The cookies are delicious, but I still have some tips for you if you get this mix in the future.

1. There was not enough frosting for the amount of cookies the mix yielded. Don't fret. There are several ways to make your baking experience a success if you know ahead that there will not be enough frosting. There is plenty of sanding sugar, even if your kids have a heavy hand with sugar. I only had enough frosting for about 40 cookies. So, before you bake the remaining 20 cookies, make a little egg wash (beat one egg in a small bowl), and brush it onto the unbaked cookies. Then sprinkle some of the sanding sugar onto the egg washed cookies and bake as normal. These cookies are great for people watching their weight because it doesn't have the added frosting.

2. The frosting works better in the beginning than later, so frost and then decorate. It would be great if you had someone else helping you make your cookies. An assembly line would be great. Have one person squeeze the frosting promptly after the bag is kneaded and cut onto the cookies. Have another person spread the frosting around. If you are thinking you can use this box mix to make something like this, think again. This frosting doesn't work that way. So you can use the cookie mix and cookie cutters--but not the frosting. Use this frosting if you aren't really worried about a finished look but more of an artists take. This mix would be great for young children.

That's it, everything in the mix was great (I love that you can make the cookies with melted butter so you don't have to worry about getting it to room temperature) except the frosting wasn't as great. Lucky for me, I did my share of decorating this Christmas and had some extra frosting lying around so I used that in a pinch. You could also make your own really quickly if you were running low, but again, you'd have to have room temperature butter already on the sidelines...so play it safe and bake a few with sugar and no frosting.

Monday, December 20, 2010

California Snowmen

This Christmas season I have had entirely too much time on my hands. Yesterday, I was browsing through a few blogs looking for last minute crafts (yeah, I know.), and I came across two food related crafts that I thought fit the bill. One of them was these adorable melted snowman cookies. Not only did these scream adorable, but also perfect for California, cause when was the last time you saw a real live snowman in the Los Angeles sunshine?

I found the tutorial of how to make these over on Crazy Domestic (she's a better frosting piper than I am so click on the link to see), I should've known by the name of the blog what the project entailed. I sure am glad I undertook this project, but while I was doing it I thought of who else I know that might take the time (3 hours I think) to embark upon a decorating project like this. I couldn't really think of anyone. But, perhaps some of you are decorating experts, or, like me you think these are too adorable to pass up. Then go for it!

For this project, I followed the recipe for Royal Icing from Bake at 350's blog which was featured on the Pioneer Woman's blog a few weeks ago. I made a half batch which was still too much for my 14 cookies, and I made what is called Flood Icing which is made by adding tiny increments of water until it runs like syrup. I think I probably still made mine a little thick. Also, this frosting is particularly tasty but I didn't want to turn it brown with vanilla, so I left it as is.

For the red & brown frosting, I used Wilton decorating frosting that comes in the tube (cheaper at Michael's than Ralph's) and the Wilton decorating plastic tips that you can buy specifically to use with those squeeze bottles. The brown frosting is chocolate and adds a lot of flavor to the cookies. The red frosting has a nice taste too. For the blue frosting I used Betty Crocker's Decorating Pressurized can frosting and one of the tips that comes with it. For the orange frosting, I used Wilton Gel frosting which comes in a tiny squeeze bottle and is much easier to handle because of the precision tip. I might have gotten more gel frosting if I had known it would be easier to handle. For the green frosting, I used liquid food coloring and mixed a green with the white flood frosting--it was kinda runny but I liked how it came out on the finished project.

The cookies are sugar cookies--I used the Pillsbury kind that comes in the roll. I got 14 cookies and they are gigantic. I think you could probably make them smaller. I recommend following the directions on the package and cutting 1/2 inch rounds. I made the first 6 golf ball size and flattened them and they were enormous when they came out of the oven. However, if you are going to make your snowmen with kids, the bigger size might be easier to decorate. The heads are marshmallows that are heated slightly in the microwave so that they look deformed and melty.

I can't imagine that I will ever have time to make these again, unless I become some sort of expert decorator or have helpers. Even though I cheated on the cookies it still took several hours. But I found it fun and rewarding, and look how cute they are!!! Now to store them until Christmas...

Sunday, June 27, 2010

If you make nothing else this summer...


Do yourself a favor...and make these cookies. I know what you are thinking, I have pushed these cookies time and time again. And it is true, I have. But I cannot tell you how perfect they are for a summer treat or a surprise guest or for something small when you are really craving an entire pan of brownies.

And the very best part about these cookies is that you can keep them in the freezer indefinitely and they don't need to be thawed before you eat them!

So anyway, listen to me, you need to make these cookies! And then keep some ice cream in the house and you're set. Your friends will love you!

Sunday, June 6, 2010

Lemon Lavender Sugar Cookies

During my daily blog reading, I spotted a recipe for lavender sugar cookies and thought those would be just the thing for the shower I held yesterday. But then I read the recipe and learned that it was vegan. It is very possible that it is still delicious, but it required me to pick up all these ingredients with which I was unfamiliar. I suppose I could have just substituted the non-vegan varieties but that didn't even occur to me at the time.

I searched the web for another lemon sugar cookie recipe and used that for the cookie base and then also made lavender sugar for the topping. Also unfamiliar with the properties of lavender, I made the sugar topping two ways. First, I contacted my sister about getting some lavender direct from her garden so that I could bake with it. Nobody knew if this was the right kind of lavender for baking but I thought I'd give it a try anyway, I didn't know where else to get it.

Next I took 3-4 lavender flowers and put them in a container with about 1 cup of white sugar. I sealed the container and let it sit for about 4 days. When I removed the flowers the sugar was clumpy but a good shake and some fork raking took care of that. This sugar lasted in the container a couple of weeks until I needed it.

The other lavender sugar I made the day of baking. I took 4 lavender flowers and ground them with 1/2 cup of sugar in the mini chopper. This made the sugar superfine and also gave the cookies a nice design with the little pieces of flowers inside. I think this looks best but both cookies have the same light lavender flavors on top of the tangy lemon. This is a perfect spring into summer dessert!

Ingredients:
Lavender sugar of your choice
1 1/2 C sugar
Zest of 2 lemons
1 C. butter, softened
2 large eggs
1 t. vanilla
1 T. lemon juice
2 3/4 C flour
1/4 t. salt
2 t. cream of tartar
1 t. baking soda

Directions
1. Cream butter and sugar. Add vanilla, eggs, lemon juice and zest
2. In a separate bowl mix the salt, cream of tartar, baking soda and flour
3. Add the flour mixture into the butter mixture slowly, mixing in between
4. Refrigerate the dough covered for at least an hour
5. Preheat the oven to 350
6. Roll dough between your palms (I was going for small cookies, you choose your size). Then roll dough balls into the lavender sugar
7. Place 2 inches apart on a cookie sheet and bake 7-10 minutes or until lightly browned and puffy. The cookies will flatten when they are cooled, cool fully on wire racks.

Monday, May 10, 2010

One-Bowl Chocolate Chunk Pecan Cookies

A family friend gave me this book Sticky, Chewy, Messy, Gooey for my wedding shower and I have been wanting to make some recipe from it but haven't had the chance until this weekend.

I chose to make one-bowl chocolate chunk pecan cookies the key being that they use only ONE BOWL and no mixer PLUS they use melted butter, so you don't have to worry about leaving it out for hours.

Get this book! If this recipe was this delicious I bet the rest of it is outstanding!

A few notes about these cookies:
1. Refrigerate the dough for an hour like it calls for, do not be tempted to bake them before refrigerating.
2. Try to let the pecans cool before adding them to the dough--but add them before refrigeration, if you add them when they are hot the dough gets extra runny
3. Make small cookies, about the size of one scoop from a regular spoon. Small cookies mean big huge chunks of deliciousness
4. One of my friends gave me some extra concentrated vanilla from Penzey's, they say to use half of what the recipe calls for but I always forget so these cookies could be awesomer because I used twice the vanilla the recipe called for. You may want to do that.

My mom has baked the same chocolate chip walnut cookie for years and she volunteered that this cookie is superior and her new go-to favorite.

Ingredients
2 C pecan halves
1 C unsalted butter
3/4 C packed brown sugar
3/4 C granulated sugar
2 Large eggs
1 t salt
2 t vanilla extract (technically I used 4t see above)
2 1/4 C flour
1/2 t baking soda
1/4 baking powder
2 C semisweet chocolate chunks

Directions
1. Preheat oven to 350. Toast pecan halves 6-8 minutes until fragrant.
2. Meanwhile, melt butter in a large microwave safe bowl for 1 minute. Remove from microwave and stir with a wooden spoon until fully melted.
3. Stir in sugars until smooth. Add salt, vanilla and eggs, stir until smooth.
4. Add flour, baking soda and baking powder and stir until a soft dough forms.
5. Fold in toasted pecans and chocolate chunks. Cover and refrigerate the bowl for at least an hour (especially if you didn't find time to cool pecans). Preheat the oven again to 350 if you turned it off.
6. Scoop small regular spoon sized scoops onto cookie trays. Bake 10-12 minutes until they look slightly golden brown.
7. Cool slightly before moving to a rack. Enjoy warm, or cold, or anytime at all, but be sure to make and try these cookies!

Monday, March 22, 2010

Smiley Face Cookies

There used to be a bakery in downtown Wheaton, IL called Carney's. It was a family favorite growing up. I especially loved the Smiley Face cookies. Unfortunately, Carney's went out of business when I was away and along with it went the perfect smiley face cookie. I've had it in my mind to recreate these cookies but first I had to find the perfect pieces.

This recipe didn't turn out exactly the same--I need a cookie that is crunchier and a glaze that is thicker (and doesn't seep into the cookie). The chocolate frosting was perfect though.

Smiley Face Cookies
The Cookie:
I used the recipe number one on Simply Recipes I didn't have cream so I just used whole milk and they are still delicious. I used this special vanilla and that made them extra delicious. I think it is important to refrigerate the dough before using it so it is easier to use and between batches. I also think it is important to sift the dry ingredients as she says. Make sure the cookies are completely cool before glazing or the glaze will just drip in.
The Glaze:
I used this recipe because those cookies looked about right. I didn't have enough so I kept having to make it again. I used liquid food coloring because the gel kind wouldn't stick--I had to use a lot of coloring to get the yellow I wanted. To glaze, hold the cookie on the edges and dip one face into the glaze. Turn over and try to distribute the glaze from side to side. Place on a cooling rack and let the glaze dry before trying to put on your face.
The Face:
I made a quarter of this recipe. I will re-post it here as 1/4 cause it is so hard to find on that blog.
1/4 C butter, room temperature
1/4 t vanilla
1 C powdered sugar
1 tsp Cream of Tarter
1/8 C cocoa powder
1 oz semisweet chocolate melted and cooled
1-2 tsp whole milk

Mix dry ingredients. In a separate bowl, cream butter. Add vanilla and mix again. Slowly add the dry mix alternating with the cream until all is added. Add the melted chocolate and mix until combined. Place in a piping bag or ziploc bag (snip a small corner) and pipe onto cooled cookies. Piping the face takes a steady hand and I had my share of mistakes but luckily you have enough frosting for that.

I made 32 cookies. They are better if stored in the refrigerator. They are delicious, but they are not the same, not this time.

Thursday, January 8, 2009

Jumbo Chocolate Chip Cookie Perfection

I have been on a constant mission to create a chocolate chip cookie that is chewy and delicious and more similar to Mrs. Field's Famous. Even after obtaining the supposed recipe that Mrs. Field's uses, I was unable to conquer my dream.

Until today.

Today I decided to whip up a batch of chocolate chip cookies. I was going to use the regular recipe on the back of the Nestle Chocolate Chips package until I noticed something peeking out of the inside of the Land o' Lakes butter carton. I ripped the carton open, perhaps a little too zealously, and discovered a new recipe for a Jumbo Chocolate Chip Cookie.


I compared the ingredients and discovered that the differences were the use of both baking powder and soda as well as 1/2 C more butter and 2 cups more flour. So, after discovering that these were indeed a healthier cookie, I decided to test out the recipe.

I whipped up a batch in no time at all and was soon putting 14 gigantic balls of dough into the oven. A friend gave me a tip recently on the art of the chewy cookie warning me that when the cookies are ever so slightly brown, but look still kind of raw, they should be removed from the oven. This tip agreed with the butter carton warning telling me not to overbake (in capital letters).

This cookie and recipe has helped me to achieve cookie perfection.

Jumbo Chocolate Chip Cookie Perfection
via Land O' Lakes
4 1/4 cups all-purpose flour
1 teaspoon baking powder
1 teaspoon baking soda
1 1/2 cups LAND O LAKES® Butter, softened
1 1/4 cups sugar
1 1/4 cups firmly packed brown sugar
2 eggs
1 tablespoon vanilla
1 (12-ounce) package (2 cups) real semi-sweet chocolate chunks or chocolate chips


Heat oven to 375°F. Combine flour, baking powder and baking soda in medium bowl; set aside.

Combine butter, sugar and brown sugar in large bowl. Beat at medium speed, scraping bowl often, until creamy. Add eggs and vanilla. Continue beating, scraping bowl often, until well mixed.

Reduce speed to low. Beat, gradually adding flour mixture, until well mixed. Stir in chocolate chunks by hand.

Drop dough by 1/4 cupfuls, 2 inches apart, onto ungreased cookie sheets. Bake for 10 to 14 minutes or until light golden brown. (DO NOT OVERBAKE.) Let stand 1 to 2 minutes; remove from cookie sheets. .

TIP: For 2 1/2-inch cookies, drop dough by rounded tablespoonfuls, 2 inches apart, onto ungreased cookie sheets. Bake for 10 to 12 minutes or until light golden brown. 4 dozen cookies.

***UPDATE**** I made these cookies again but used only 3 1/2 cups of flour and they were still delicious. Also, I have a sneaking suspision that I forgot the white sugar and only used the brown. Still good. Also I used Ghiradelli chocolate chips which are ginormous (and therefore better)

Sunday, December 28, 2008

Holland Butter Cookies

One of Mom's favorite cookies to make were Holland Butter Cookies -- when asked what she was making for a dessert, she would say "Hollands". I also make these for Christmas, although we finished most of them off before Christmas day. They are simple to make and taste good -- two key criteria for most of us.

Cream: 1 cup butter and 3/4 cup sugar
Add the following and mix until it doesn't stick to the bowl:
1 egg yolk beaten
2 cups sifted flour
1 tsp. vanilla

Press on cookie sheet to 1/4 inch thickness. Scatter nuts (3/4 cup chopped nuts) on top and press lightly into dough. Bake in 300 degree overn until light brown (bake longer than most cookies). Let cool a few minutes and cut into squares (do not let cool too much before cutting).

For Christmas, Mom sometimes used used red and green sprinkles instead of the nuts for a festive touch.

Key Lime Spritz Cookies

I had saved this recipe for key lime spritz cookies from Midwest Living last year (it intrigued me) and made them as part of Christmas dessert. They were a big hit, so wanted to post the recipe. Here is the link to the recipe: http://www.midwestliving.com/recipe/cookies/key-lime-spritz-cookies/

I didn't have key limes or key lime juice so I used regular lime. While the icing was optional, I think it was a good addition. I didn't take a picture, but there is one with the recipe.


Enjoy

Saturday, November 15, 2008

Pie Crust Dots

The biggest problem about building a registry is the realization that there are all these great things out there that you don't have but could have. Then you start wishing you had something right now so you could make some variation of some recipe that you were really jonesing for. Just that happened the other night.

I made some pie crust cookies, but as usual with cookies where you roll out the dough, there was a lot of leftover pieces. I decided to experiment with these leftover pieces because I don't actually have a rolling pin--and trying to roll the leftover pie crust to just the same thickness as the other pie crust proved problematic with the drinking glass.

As it turned out, my little experiment was absolutely delicious and is recommended to all.


Pie Crust Dots
Ingredients:
1 pie crust (I used Pillsbury refrigerated dough)
1 cup mini chocolate chips
sugar
cocoa
cinnamon

Directions:
1. Heat oven to 350
2. Roll pie crust into one sheet
3. Mix together cocoa and sugar in a small bowl to taste
4. Mix together cinnamon and sugar in a small bowl to taste
5. Pinch off 1 1/2 teaspoons of dough
6. Fill Dough with mini chocolate chips and roll into a ball
7. Rub the ball in either the cocoa or cinnamon mixture and set on a cookie sheet (I couldn't find mine so I used a loaf pan)
8. Repeat until you have used up all the dough.
9. Back for 7-10 minutes until golden brown, chocolate centers may not fully melt.

Enjoy!

Thursday, November 13, 2008

Pie Crust Cookies

When I was little, my favorite part about Thanksgiving preparation were the little scraps of food my mom and dad made as part of the fun and the pre-feast. My mom's specialty was pie crust leftovers. She took the edges she cut off her pies and sprinkled them with cinnamon and sugar and then put them in the oven so we had some pie crust cookies. I really liked them before they went in the oven best...

I recently bought this pie crust and I didn't know what to do with it. For some reason, pie didn't cross my mind at all. The thing with pie is that it is hard to share and seems too fancy, I just wanted to make something simple and delicious.

I settled on pie crust cookies, a blast from the past. I had the refrigerated dough so it was easy as pie to roll it out. I cut the dough into star shapes with a very nice cookie cutter I didn't even know I had. I cut out the stars one by one and put them on the tray. It was so nice to be able to use my cookie cutters without the hassle of rolling out and refrigerating bits of dough all day long.

I filled the tray and then gathered the toppings. The thing about pie crust is that it is not super sweet, so the toppings have to be a little sweet themselves to give a depth of flavor into the cookie. I beat an egg in a glass and took out my silicone pastry brush. I mixed together some cinnamon and sugar. Then I went out on a limb and mixed together some cocoa and sugar. I painted the stars with the egg and then sprinkled on the toppings.

The cookies are really good, a big hit to everyone who has tried them. And so easy and just a little different than the average chocolate chip cookie. I think they also look great--kind of like a fancy dessert.

Pie Crust Cookies
cinnamon
sugar
cocoa
1 egg (or you could just use the white)
1 pie crust
cookie cutter

Preheat the oven to 350
1. Beat the egg with a fork
2. Combine cinnamon and sugar in a small bowl to taste
3. Combine sugar and cocoa in a separate small bowl to taste
4. Roll out dough and cut into desired shapes, place on a cookie sheet
5. Paint cookies with egg
6. Sprinkle, alternating by cookie, with sugar mixtures
7. Bake at 350 for 7-10 minutes or until golden brown


Thursday, October 9, 2008

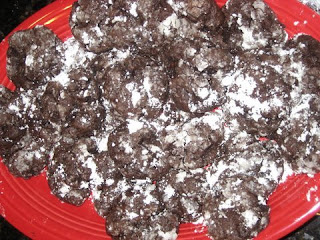
Chocolate Gooey Butter Cookies

Paula Dean always makes rich and delicious looking dishes. For the same party, I wanted to make a chocolatey dessert. I wanted to use the free box of Betty Crocker cake mix I had lying around but I didn't really want to make cake. I didn't know what to do.

I was browsing the new Food Network Site (which now has pictures! finally) and I came across this recipe for Chocolate Gooey Butter Cookies. Again, they were really easy, and a big hit! The only thing is that they take a bit of time to sit in the refrigerator because the dough is so unbelievably thick.

Chocolate Gooey Butter Cookies


Ingredients:
1 8oz bar of cream cheese (I used lowfat) at room temperature
1 stick butter, at room temperature
1 egg
1t vanilla extract
1 box pudding in the mix chocolate cake mix (I used Betty Crocker Triple Chocolate)
Confectioners sugar

Directions:
-Preheat the oven to 350 degrees
-Cream together the cream cheese and butter
-Add the egg and extract and beat until mixed
-Add cake mix and mix until just combined
-Cover and refrigerate for 2 hours
-Roll 1 T of dough into a ball and then roll in powdered sugar
-Set 2 inches apart on a cookie tray
-Bake for 12 minutes, the cookies will be moist and gooey

Eat!

Tuesday, June 24, 2008

Grandma Lorene's Chewy Chocolate Cookies or Lakeside Ice Cream Sandwich Cookies


On hot, humid Wisconsin days at our grandparents' summer home, after trudging up the steep hill after a swim in the lake with Grandpa, Grandma always had a tin of these cookies awaiting us at the top. For a refreshing summer treat, she'd serve them with a small scoop of vanilla ice cream between two cookies, creating an ice cream sandwich.

Grandma Lorene's Chewy Chocolate Cookies

1 1/4 C. butter or margarine
2 C. sugar
2 eggs
2 t. vanilla

2 C. unsifted flour
3/4 C. Hershey's Cocoa
1 t. baking soda
1/2 t. salt

1 C. chopped pecans or walnuts
Preheat oven to 350. Combine flour, cocoa, baking soda, and salt. Set aside.

Cream butter and sugar; add eggs and vanilla and mix well. Blend dry ingredients into butter mixture. Stir in nuts.
Drop by teaspoonfuls on an ungreased cookie sheet. Bake for 10-12 minutes (they will be airy and puffy and not look done), let cool for 1 minunte (they will become flatter) before removing to wire rack. Don't overbake, as these cookies should have a chewy texture after cooling. I like to freeze these right away, but you can also put a slice of bread in the tin to keep them soft.

These cookies are delicious served with vanilla ice cream between two cookies.

Or you can just enjoy them with a cool glass of milk . . .