Monday, December 28, 2009
Hawaiian Pizza
While searching the internet I came across a Von's ad telling me ideas to do with my leftovers. What a great idea! I searched the site and came across Hawaiian Pizza. The recipe seemed easy enough so I went to the store (and felt bad because Von's wasn't on the way so I didn't go there), got the ingredients and set to work. Our pizza didn't cook perfectly and for the second time I opened a can of Pillsbury Pizza Dough with a hole in it. I totally should've gone for the store brand. But, the pizza turned out edible and a "pretty good" from the toughest critics.
Next time I will:
Better drain the pineapple and make sure they aren't extra wet
Bake the pizza at 450 (instead of 400), despite my pan being non-stick it doesn't qualify as dark
Make sure the cheese is melted
Hawaiian Pizza
1/2 cup pizza sauce (I used the pre-made kind near the Boboli display)
2 C mozzarella cheese
1 C diced ham
1 can chopped pineapples in their own juice
1 pizza crust
Crushed Red Pepper (optional)
Directions:
-Pre-heat the oven to 450
-Spray a cookie sheet with cooking spray. Spread the refrigerated dough in a rectangle on the prepared sheet.
-Spread pizza sauce (you may want a little more) on the dough leaving a half inch or less edge.
-Reserve 1/4 cup of cheese. Sprinkle the remaining cheese over the sauce. Add the ham and pineapple chunks on top. Sprinkle with the reserved cheese.
-Bake according to the can directions 13-17 minutes until crust is golden and cheese is melted
-Slide off the pan to a wood board and let sit a few minutes before cutting, serve.
Thursday, December 24, 2009
New Product: Amy's Frozen Indian Dinner
As it turns out, Amy's take on Indian food is not at all bad. Of course the portions are small but the flavors are there. I would get this again if I needed a quick and relatively healthy dinner.
Saturday, December 12, 2009
Mom's Beef Stew
Mom's Beef stew is just what I crave when the weather starts to turn wintery and cold. This year I jumped the gun a little and made it in the fall and it was still great. While this stew doesn't take a ton of hands on time, it does sit in the oven for five hours so you have to be home. It occurs to me, however, that this could be made in the slow cooker. I haven't tried it, but I think that it would work fine. I doubled the recipe last time I made it and had way too much (and it was almost too big for the pot). Start with one recipe on your first try, it serves 4-6 hearty portions on top of delicious mashed potatoes.
Mom's Beef Stew (1 hour prep, 5 hours cooking)
Ingredients
2 lbs beef stew meat
1/2 c white or rye bread, ~1 slice, broken into small pieces
1 c chopped celery
1 t. Lawry's Seasoning Salt
1/2 T sugar
3 T tapioca
1 2lb can whole tomatoes
3 onions cut into bite sized pieces
6 carrots cut into bite sized pieces
1 t lemon juice
1 t Worcestershire sauce
dash allspice
1/4 t. pepper
1/2 t. paprika
1/2 t. garlic salt
48oz (or less) V8 tomato juice
Mashed potatoes, for serving
Combine all ingredients in a large oven-safe pot with lid (such as a corningware casserolle or le crueset pot or dutch oven). Cover, bake 5 hours at 300 degrees. Serve warm over mashed potatoes.
Saturday, November 28, 2009
Alton Brown's Sweet Potato Pie
I agree that this pie was super easy. The only problem was that it wasn't a huge hit at Thanksgiving because everyone went for their favorite classics as fast as possible. I think though if we hadn't brought a pumpkin pie as well, and we removed the toasted pecans from the top, people would've eaten the Sweet Potato and not really noticed a huge difference. I think that this was one of the prettiest pies we brought to Thanksgiving, of the five.
I learned that at Thanksgiving, sweet potatoes are suddenly synonymous with yams even though they aren't really the same thing. The first time I bought yams with a yellowish flesh. The second time (after one got moldy from improper storing techniques)I purchased red yams which were on special and they were really more sweet potato-esque with orange flesh. I'm kind of glad the first set went moldy cause otherwise the color would have been way off.
Ingredients
* 1 pound 3 ounces sweet potatoes, peeled and cubed
* 1 1/4 cups plain yogurt
* 3/4 cup packed, dark brown sugar
* 1/2 teaspoon of cinnamon
* 1/4 teaspoon of nutmeg
* 5 egg yolks
* Salt
* 1 (9-inch) deep dish, frozen pie shell
* 1 cup chopped pecans, toasted
* 1 tablespoon maple syrup
* Special equipment: steamer basket
Directions
Put cubed potatoes into steamer basket and place steamer basket into a large pot of simmering water that is no closer than 2 inches from the bottom of basket. Allow to steam for 20 minutes or until the potatoes are fork tender. Mash with potato masher and set aside.
Preheat the oven to 350 degrees F.
Place sweet potatoes in the bowl of a stand mixer and beat with the paddle attachment. Add yogurt, brown sugar, cinnamon, nutmeg, yolks, and salt, to taste, and beat until well combined. Pour this batter into the pie shell and place onto a sheet pan. Sprinkle pecans on top and drizzle with maple syrup.
Bake for 50 to 55 minutes or until the custard reaches 165 to 180 degrees. Remove from oven and cool. Keep refrigerated after cooling.
Friday, November 27, 2009
Alton Brown's Super Apple Pie
Joey and I watched a video of Alton Brown's take on apple pie and were hooked on trying it out. Of course, it requires all sorts of things we didn't have so it was quite the shopping list to get it all taken care of. The result? An apple pie that tastes like apples--not the traditional spices--with a hint of rye bread. Perhaps if we had reacted earlier to the grocery list, we would've gotten the Grains of Paradise and then not had that hint of rye bread involved. We made two apple pies Alton style, one following the recipe and one with traditional spices. Both were eaten and well liked. Different strokes for different folks I guess. The liquids in the pie made it more of a sticky pie like peach pie than your typical apple.
We got a lot of use out of our kitchen scale for this recipe. We also bought the 2 inch deep tart pans so that the sides could come off for easy slicing and serving. Those worked really well, but if you want to stick with the fall-apart slice from a traditional pie tin that's your prerogative. Alton used a 12-slice apple cutter, but you could just cut your apple slices in half. We got a 16 slicer from William-Sonoma and it wasn't as great as we hoped it would be.
We didn't have a pie bird. For one pie we just cut the slits in the top. For the other, Joey constructed a pie bird (or funnel) out of tin foil. It was quiet the topic of conversation but it let the steam escape so that we didn't have to slice the top. The glaze on the top is from the apples but I don't think it looks that pretty--although it did taste good.
The addition of crisco and brandy in the pie crust made it so easy to work with when I rolled it out! I couldn't believe how easy it was. Usually any kind of dough fights me for the last word and wins. The crust didn't really even taste like the brandy at all.
Alton Brown's Super Apple Pie
For the crust:
* 6 ounces unsalted butter, cut into 1/2-inch pieces
* 2 ounces vegetable shortening, cut into 1/2-inch pieces
* 5 to 7 tablespoons applejack
* 12 ounces all-purpose flour, approximately 2 3/4 cups, plus extra for dusting
* 1 teaspoon table salt
* 1 tablespoon granulated sugar
* This must sit in the fridge at least 1 hour or overnight
For the filling:
* 3 to 3 1/2 pounds apples, mixture of Granny Smith, Honeycrisp, Braeburn and Golden Delicious, about 6 large apples
* 1/2 cup sugar, divided
* 3 tablespoons tapioca flour
* 2 tablespoons apple jelly
* 1 tablespoon apple cider
* 2 teaspoons freshly squeezed lime juice
* 1/4 teaspoon kosher salt
* 1/4 teaspoon freshly ground grains of paradise
Directions
For the crust:
Place the butter, shortening and applejack into the refrigerator for 1 hour.
In the bowl of a food processor, combine the flour, salt and sugar by pulsing 3 to 4 times. Add the butter and pulse 5 to 6 times until the texture looks mealy. Add the shortening and pulse another 3 to 4 times until incorporated.
Remove the lid of the food processor and sprinkle in 5 tablespoons of the applejack. Replace the lid and pulse 5 times. Add more applejack as needed, and pulse again until the mixture holds together when squeezed. Weigh the dough and divide in half. Shape each half into a disk, wrap in plastic wrap and refrigerate for at least 1 hour and up to overnight.
For the filling:
Peel and core the apples. Slice into 1/2-inch thick wedges. Toss all of the apples with 1/4 cup of the sugar, place in a colander set over a large bowl and allow to drain for 1 1/2 hours.
Transfer the drained liquid to a small saucepan, place over medium heat and reduce to 2 tablespoons. Set aside to cool. Toss the apples with the remaining sugar, tapioca flour, jelly, cider, lime juice, salt and grains of paradise.
For assembling and baking the pie:
Preheat oven to 425 degrees F.
Remove one disk of dough from the refrigerator. Place the dough onto a lightly floured piece of waxed paper. Lightly sprinkle the top of the dough with flour and roll out into a 12-inch circle. Place into a 9 1/2 to 10-inch tart pan that is 2-inches deep. Gently press the dough into the sides of the pan, crimping and trimming the edges as necessary. Set a pie bird in the center of the bottom of the pan.
Place the apples into the unbaked pie shell in concentric circles starting around the edges, working towards the center and forming a slight mound in the center of the pie. Pour over any liquid that remains in the bowl. Roll out the second pie dough as the first. Place this dough over the apples, pressing the pie bird through the top crust. Press together the edges of the dough around the rim of the pie. Brush the top crust with the reduced juice everywhere except around the edge of pie. Trim any excess dough. Place the pie on a half sheet pan lined with parchment paper and bake on the floor of the oven for 30 minutes. Transfer to the lower rack of the oven and continue to bake another 20 minutes or until the apples are cooked through but not mushy. Remove to a rack and cool a minimum of 4 hours or until almost room temperature.
Thursday, October 29, 2009
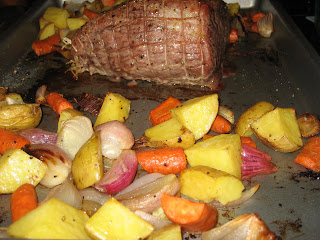
Roast Beef and Vegetables
Joey did the grocery shopping this week and suggested we do one of those one-bag weeks that they feature in Food Everyday. one of Martha Stewart's magazine. The idea is that you buy only a couple of ingredients and rely on staples and then make something one day and use the leftovers to make something different another day. Joey thought it would fun for us to make roast beef and then French Dip Sandwiches later. I thought that sounded like a great idea!
My favorite place to look for recipes is Martha Stewart's website. It turns out, all her recipes aren't crazy-hard, but are actually made for the home cook. This dish was so quick and easy! I got home from work around 5:30pm. The most time consuming part was peeling all the shallots, but if you wanted you could do those in advance. Then I cut up some carrots and potatoes and threw it all in the oven. It really did take about 15 minutes to prep and about 50 minutes to cook. That may sound long to you, except if you think about what you might have done instead of cooking--in the long run you would probably save time and money. If instead, Joey and I decided to go out for dinner. The whole affair, if we went to a sit down restaurant would probably take more than an hour and be much more expensive.
Roast Beef with Vegetables
1 1/2 pounds eye-of-round beef roast, tied (mine came tied)
1 1/2 pounds small red new potatoes halved or 3-4 medium sized yellow potatoes quartered
5 carrots, cut into chunks about the same size as the potatoes
1 lb shallots, peeled and halved
2 T olive oil
salt and pepper
Preheat the oven to 400 degrees
1. Cut potatoes, shallots and carrots. Place them on a jellyroll pan with edges and toss with olive oil, salt and pepper.
2. Move vegetables to the short edges of pan and place the roast in the middle. Rub the roast in the oil on the pan. Salt and Pepper generously.
3. Place the pan in the middle of the oven and roast for 40-50 minutes until a thermometer entered in the thickest part of the meat registers 130 for medium rare. (mine took about 50 minutes and then ended up being 135 which was actually still pretty rare).
4. Slice and serve with vegetables
Wednesday, October 7, 2009
Instant Mashed Potatoes (and rutabaga)
The grocery store was packed. I chose my chicken thighs and tried to recall if the braised recipe had anything else in it that I didn't have. I have recently been working on keeping a stocked pantry. I was pretty sure the recipe called for wine (if you don't drink wine, those little picnic bottles are perfect for cooking..they come in the size most recipes call for so you're not left with an open bottle), dried plums, and chicken...but I was sure something else was hiding from me. I also recalled that the braised chicken was best over mashed potatoes. I browsed the pre-made section and saw that in order for me to get potatoes pre-made I'd have to buy enough for four. Dinner was possibly just for me. Finally I recalled that I had a potato, milk and butter at home...so I reasoned I could just make them myself.
Mashed potatoes are easy! I don't know what all the fuss is about! I will share with you the recipe I made up so that you too can make just a little instead of family-size. I added rutabaga to my potatoes for the satisfying bitterness that I love, but you could omit that
Ingredients:
1 - 2 baking potatoes, peeled and cut into small even chunks
1 small rutabaga, peeled and cut into small even chunks (optional)
1 1/2 T butter +
2/3 C milk or cream, any variety
Lots of salt
1. Boil water in a pot big enough to fit all the potatoes
2. Add potato chunks to pot and boil until fork-tender (about 20 minutes)
3. Drain potatoes and return to pan
4. Add butter and milk and mash with a potato masher or hand mixer until the texture you prefer. Salt to taste (I used a lot of salt but it all came from the salt shaker so, no measurement) and serve warm.
Tuesday, October 6, 2009
Pan-Roasted Pork Loin and Leeks
On Sunday we decided to have Gavin over for dinner and games. In the fridge I have a big pot of swoop er soup, but I had the time to make something different and equally as good. So, I pulled out my big recipe binder and started flipping through the pages. It finally landed on a recipe for Pan Roasted Pork and Leeks from the September 2007 issue of Cooking Light. I saw that, like most recipes in that binder, I had never tried it. I scanned the details to find that the recipe was unbelievably simple and required barely any ingredients. I expected the final product to be tasteless. As it turned out however, it was divine. The pork was moist and delicious and the leeks, after simmering for hours, turned sweet with a texture of cooked cabbage but a taste of something more like apples.
The recipe says this is worthy of a special occasion...and it could be, but it is simple enough for a nice weekend meal, especially if you're going to be home anyway tending to other things.
Pan-Roasted Pork Loin and Leeks
Ingredients:
- 4 large leeks (about 2 1/4 pounds)
- 1/2 cup water
- 1 tablespoon butter, divided
- 1/2 teaspoon salt, divided
- 1/2 teaspoon black pepper, divided
- 1 (2-pound) boneless pork loin, trimmed
- 1/2 cup dry white wine
- *Large Pot big enough to fit the pork, or cut the pork into chunks so that it fits in the pot
1. Prepare leeks according to this video, slicing the light green and some white parts into 1/2 inch thick.
2. Fish leeks out of bowl of cold water with your hands and add with, 1/2 cup water, 1 t butter (it appears that 1 TBSP butter is equal to 2 1/2 t), 1/4t salt, 1/4 pepper to a large pot.* Saute for 10 minutes over medium-high heat.
3. Pour leek mixture into a bowl and set aside.
4. In the same pot, heat the remaining 2 t butter. Add pork and brown on all sides, about 5 minutes of cooking.
5. Add remaining salt and pepper and wine. Cook for 15 seconds scrapping brown bits from the bottom of the pan
6. Return leek mixture to pan, cover, and reduce heat. Simmer for 2 hours.
7. Slice pork in thin slices and serve with leek mixture.
I don't have a picture, but Cooking Light does.
Saturday, October 3, 2009
Tex-Mex Stuffed Acorn Squash
I pulled this recipe from Prevention Magazine's Flatten your belly with food... (Intriguing, I know..)
It needs a little something, something. I'm not sure if it's just because I had eaten something spicy right before hand or not. Perhaps I just needed some salt on it.
Here it is:
(4 servings)
2 Acorn Squash
2 tsp Olive Oil
1/2 tsp ground black pepper
1 cup canned black beans, rinsed, drained
1/2 cup pine nuts (Fareway doesn't sell these, so I subbed sunflower seeds)
1 large tomato, coarsely chopped
2 scallions, thinly sliced
1 tsp ground cumin
2 oz Monterey Jack cheese, shredded
Brush cut sides and cavity of squash with oil. Sprinkle with 1/4 teaspoon of the pepper. Place cut-side down on prepared baking sheet. Bake 30 to 40 minutes until tender (don't pierce with fork). Turn cut-side up
Mix beans, pine nuts, tomato, scallions, cumin, and remaining 1/4 teaspoon pepper in medium bowl. Spoon heaping 1/2 cup of bean mixture into each squash half, pressing down gently to get all filling in. Sprinkle evenly with cheese.
Bake 10 to 15 minutes, until cheese is melted and golden brown
let cool and then eat :)
I did take a photo of it, but my phone and computer aren't cooperating with the blue tooth connections. My apologies
Friday, October 2, 2009
Pasta and Bean Soup
Bacon is one of my favorite foods, it adds a delicious flavor to beans and stews, it adds that salty crunch with sweet pancakes and it even adds quite a distinct texture to cookies (its true, I made bacon chocolate chip cookies last Christmas) but that's neither here nor there. The problem I have with bacon is the size of the package it comes in. Most recipes called for 4-6 strips of bacon leaving a sizable amount of unused bacon. I have to admit, freezing stuff isn't currently an option in my house. I freeze a couple of slices of bacon or an extra piece of chicken and then forget about it until it is unrecognizingly covered in ice crystals.
So my only alternative with leftover bacon is to use it in a number of recipes that are different enough from each other to not taste like we're eating bacon all week. In my search for a second use of bacon (since the potato chowder), I found a recipe for Pasta e Fagioli. This soup promised to taste "very similar to Olive Garden's soup." Joey assures me that this is not true. This soup was really tasty--but in Joey's words "Olive Garden's soup has two colors of beans which change the taste and it's beefier." Indeed--every soup that has beef as one of the ingredients is beefier than this one ;).
This soup was posted by someone else..who you ask? I don't have that in front of me...oops. It is really easy to make and tastes great. This recipe makes a LOT of soup, so you may either want to cut the recipe in half or do that thing people call "freezing" for a rainy day.
Pasta and Bean Soup
Ingredients:
6 slices bacon, diced *I recently discovered that a serrated bread knife is a great tool for cutting up bacon*
1 small onion, chopped
4 garlic cloves, minced
1 15 oz can diced tomatoes
2 14oz cans cannellini beans, drained *or 1 can red kidney beans and 1 can cannellini beans
1 10oz package frozen spinach, thawed for 2-3 minutes so it's not in a huge brick
6 C chicken broth
3 C water
1 8oz can tomato sauce
3 t Italian seasoning
1 scant t cilantro
1 t salt
1 t pepper
1 t oregano
8oz small pasta of your choice, uncooked *I used this new mini rotini that was on sale
Directions
1. Heat a very large heavy pot over medium heat. Add bacon and fry until just crisp. Add onion and sauté until soft (about 8 minutes). Add garlic and sauté an additional 2 minutes.
2. Add all other ingredients except pasta to the pot. Simmer for 30-40 minutes stirring occasionally.
3. After simmering, bring soup to a boil. Add pasta and cook until al dente as shown on the pasta directions. Serve with bread.
Tuesday, September 29, 2009
Fixing Martha's Spaghetti Sauce
Disappointed, I couldn't bring myself to throw the whole pot away (we ate it anyway but I also undercooked the pasta which did not help my cause). Joey and I decided that we could fix this sauce with a little of this and a little of that. So, I picked up some tortellini at the store (because it was on sale and it was just a little bit different than the pasta we'd just had) along with a small can of tomato paste and a 14.5 oz can of Hunts tomato sauce.
I heated the leftover sauce in the pan and added 2 T (roughly) of tomato paste and the entire can of tomato sauce. I simmered the sauce for about 20 minutes and served. It was much better! The flavors were still there from Martha's original recipe with the addition of a more saucy feel that really made the past better.
I also omitted the carrot from the original recipe because we forgot to get a carrot. Also, it calls for whole tomatoes. I hate using whole tomatoes from the can because no matter how much I "break up with back of spoon" while cooking or cut with scissors before putting them in the pan, I end up with gigantic chunks of tomatoes in there. I understand that whole tomatoes come in tomato juice, have more flavor, and no skin--but I still can't get behind it. Next time, I may consider pureeing the can of tomatoes in the food processor first and that might actually make the sauce saucier without the additional tomato sauce.
This recipe with the addition of the tomato sauce keeps going and going. If you make it and your family is two or smaller, I recommend freezing half of it. So far we have had this pasta sauce three times and there is still enough left over for another meal for me (and remember, Joey piles on the sauce so if you're a light saucer then it's going to be even more).
- 4 tablespoons butter
- 1 tablespoon olive oil
- 1 carrot, grated (about 1/2 cup) - see note above
- 1 onion, chopped
- 2 garlic cloves, chopped
- 3/4 pound ground beef
- 1 can (28 ounces) whole tomatoes - see note above
- 1/2 cup milk
- 1 dried bay leaf
- 1/2 teaspoon dried thyme
- 1/4 teaspoon ground nutmeg
- Coarse salt and ground pepper
- Pasta of your choice
- 1 can (14.5 ounces) tomato sauce
- 2 T tomato paste
Directions
- Heat butter and oil in a large saucepan over medium. Stir in carrot, onion, and garlic. Add ground beef, and cook until it turns from pink to brown, about 5 minutes.
- Add tomato sauce, tomato paste, and tomatoes and their liquid, crushing them with the back of a large spoon. Stir in milk, bay leaf, thyme, nutmeg, 1/2 teaspoon salt, and 1/8 teaspoon pepper. Simmer 20 minutes.
- Meanwhile, in a large pot of boiling salted water, cook fettuccine until al dente according to package instructions, about 12 minutes. Reserve about 1/2 cup of the cooking water; drain fettuccine, and return to the warm pot. Add meat sauce, and toss. Add pasta water as needed if the sauce seems dry.
Thursday, September 24, 2009
Spicy Avocado Dip
Here is an easy veggie dip that went well at a work Pot Luck the other day. You can also use it with chips I imagine..
2 Avocados (de-skinned and pitted obviously)
1 (16oz) Sour Cream (any level of fat content works)
green onions
1 packet Ranch Salad Dressing & Dip Mix
lime juice (no I don't know how much I used, but less is more)
Ground Red Pepper to taste OR
Jalepenos OR
Both :)
mix all the above and refrigerate for at least an hour before serving.
Enjoy! Sorry I do not have any photos...
Hash Browns with Sausages and Roasted Tomatoes
As with any good bed and breakfast, a hot breakfast is provided to their guests each morning. My parent's departure was today and I wanted to send them off with something filling and hot.
We received a cookbook from Joey's Aunt Trisha for our wedding entitled Easy Breakfast and Brunch and I was excited to have a chance to use it. I looked through the recipes until something caught my fancy and landed on Hash Browns with Sausages and Roasted Tomatoes. This breakfast turns out to take a lot of time but luckily I did a little planning ahead. Leave at least 40 minutes to make this unless you have either a helper or prep early.
I served this breakfast with fried eggs which were a pretty good accompaniment. I recommend serving this with some kind of egg.
Hash Browns with Sausages and Roasted Tomatoes
Serves 4 barely
Ingredients:
1 1/2 lbs potatoes, diced
4 T butter
1 L onion, finely chopped
12 premium breakfast sausages
2 T olive oil
20 cherry tomatoes, on the vine (or a whole basket from the farmer's market)
1 T balsamic vinegar
salt and pepper
Directions:
NIGHT BEFORE:
While making dinner, boil potatoes for 10-12 minutes until just tender. Store in a tupperware container in the refrigerator until morning.
Finely chop onion and place in a bag or tupperware in the refrigerator
MORNING OF:
Preheat oven to 400
1. Melt 4 T butter in a large non-stick frying pan. Add onions and saute 15 minutes until soft and golden.
2. While the onions are cooking, place the sausages on a roasting pan (although I just used a jellyroll pan). Toss with 1 T olive oil.
3. Spray another jellyroll pan with cooking spray. Toss the tomatoes on the prepared pan with the remaining olive oil
4. Mash potatoes slightly and season with salt and pepper. Add potatoes to the onions and cook 15-20 minutes until crispy
5. Meanwhile, put the sausages in the oven on the bottom shelf, cook 20 minutes, turning once.
6. After 5 minutes of cooking the sausages, place the tomatoes on the top shelf and roast 15 minutes.
7. Remove sausages from oven and let rest.
8. Remove tomatoes from oven and toss with balsamic vinegar. Put the tomatoes back in the oven and roast 5 minutes more.
9. Serve potatoes, sausages and tomatoes with their juices together with eggs.
(don't you love that spoon wearing the ladle hat? I wonder if my parents did that on purpose)
Wednesday, September 23, 2009
Potato Chowder
I wanted to make a quick and light dinner that would fill Joey and I up before softball but also give my parents that home-cooked feeling. Unfortunately, I got a late start and everything took a little bit longer than it should have so we ended up eating after our game (dinner at 9!). This soup is light and flavorful and rather quick and hands off once you get it simmering.
I watched this video and learned a valuable lesson about cleaning leeks. I have tasted that grit and sand before in finished leek dishes. I knew about the bowl part but didn't think that pouring them out wouldn't help at all.
This recipe didn't specify if herbs should be fresh or dried, but the flavor is really stand-out so I highly recommend fresh. To chop the thyme remove the leaves from the stems and roll into a thin cigar. To use the thyme, pinch leaves off of thick stems or drag your fingers against the grain to remove leaves.
Potato Chowder
1/2 t salt or to taste
4 oz chopped bacon
2 T butter
2 sliced leeks
2 t sage (fresh)
2 t thyme (fresh)
4 C chicken broth
1 1/2 C cream
1 bay leaf
3 potatoes, chopped into bite-sized pieces
green onions or chives (for topping)
shredded cheese (for topping)
Directions:
1. Saute bacon in a large stockpot
2. Add butter, leeks, sage and thyme. Let cook 1 minute
3. Add chicken broth, cream, bay leaf, and potatoes
4. Simmer until potatoes are tender.
5. Serve hot with toppings
Tuesday, September 22, 2009
Buttermilk Raspberry Cake
Last week at the Farmer's Market they had a deal of 3 pints of raspberries for $5. I couldn't pass it up--but then I ended up with a lot of raspberries to eat. I browsed my favorite food blogs and discovered Smitten Kitchen's Buttermilk Raspberry Cake. This cake is just divine. It only takes about 30 minutes start to finish and yields a delightfully light and airy cake. Smitten suggests the use of other berries...but I wouldn't do anything too sour.
Buttermilk Raspberry Cake
1 cup all-purpose flour
1/2 teaspoon baking powder
1/2 teaspoon baking soda
1/4 teaspoon salt
1/2 stick unsalted butter, softened
2/3 cup sugar
1 packet sugar in the raw for topping
1/2 teaspoon pure vanilla extract
1/2 teaspoon finely grated lemon zest
1 large egg
1/2 cup well-shaken buttermilk
1 cup fresh raspberries
Directions:
1. Preheat oven to 450. Butter and flour a 9 inch round cake pan.
2. In a small bowl whisk together first four ingredients
3. In another bowl beat butter and sugar until fluffy (2 minutes)
4. Add vanilla and zest and beat some more
5. Add egg and beat until combined
6. Alternate flour and buttermilk, starting and ending with flour, until combined
7. Pour batter into the prepared pan. Scatter with raspberries (I did a nice circular thing but couldn't see them in the end.
8. Bake 20 minutes until a toothpick comes out clean.
9. Let cool in pan and then invert onto rack and let cool some more (this didn't work for me and my cake fell apart so wait long enough before inverting)
Serve warm (or cold it's good all the time..it would be great with whipped cream.)
This cake doesn't last more than 2 days...so eat it immediately and be sure to finish the whole thing in one sitting!
Monday, September 21, 2009
Monday Afternoon Snack
Today I am hosting my parents and decided to do a little fun cooking since I was working from home anyway and surprise them with something delicious. I decided that there must be an afternoon snack, and it couldn't just be crackers!
I have been really wanting to try this white bean hummus and I thought that was just the ticket. To go along with it, I made my own tortilla chips (pita would work too but I happened to have a lot of tortillas), and a vegetable mix. Everything was delicious and worked quiet well together, it was such a quick and easy snack to make I'd do it ever day after school..er work.
White Bean Hummus
3 T olive oil
3 T fresh lemon juice (about 1 lemon)
1 can white beans, drained and rinsed
salt and pepper
paprika (optional)
Directions:
1. Whir oil, beans and lemon juice in food processor until just pureed. Salt and pepper to taste. Sprinkle with paprika if desired.
Fresh Tortilla Chips
torillas
olive oil
salt
cumin (optional)
Directions:
1. Preheat oven to 350
2. Cut tortillas into desired chip size
3. Toss with about 1-1/2 T olive oil and salt to taste
4. Bake 10 minutes or until crisp
Vegetable Mix
assorted fresh vegetables such as bell peppers, jalapeno, tomatoes, cucumbers
Kosher salt or other coarse salt
Fresh lemon juice
Directions:
1. Cut vegetables into bite-sized pieces.
2. Toss with lemon juice and salt. Let stand 30 minutes until flavors mix.
Monday, August 31, 2009
Soba Noodle Salad
This afternoon, my sister was coming over for a trip to IKEA which is conveniently located in the heart of downtown Burbank. I decided that it was a rare chance for me to make an Asian dish and to use my fun chopsticks. I knew I wanted something cold with the heat soaring into the triple digits. I found a recipe that used my Soba noodles in Martha Stewart's Whole Living recipe search. I felt it was too green and added a few vegetables to brighten it up.
The flavors were light and fresh. Katie loved it and I found it to be a little too light. I probably should've reserved more of the dressing. Next time I'll know.
Soba Noodle Salad
Ingredients:
1 two-inch piece fresh ginger, peeled, sliced into thin strips
1 serrano pepper, seeded and sliced into very thin strips
1/4 sugar
3 T fresh squeezed lime juice (about 3 limes)
2 T soy sauce
1 package firm or extra-firm tofu cut into bite-sized cubes, pat dry (if you don't like tofu you could substitute poached chicken)
1 package soba noodles (8-12oz) *whole wheat pasta would be similar, and ever since I purchased these, I have seen them at every store
4 oz snow peas, thinly sliced
1 t vegetable oil
1 cucumber, halved and cut into thin strips
1/4 bunch chives cut into 1 inch pieces
10-12 cherry tomatoes, halved
1 avocado, sliced
Sesame seeds, for serving
Directions:
1. Cook noodles according to package directions, drain, and rinse with cool water. Place in a large bowl and set aside.
2. Meanwhile, in a small saucepan, bring ginger, Serrano pepper, sugar and 1/3 c of water to a bowl. Reduce heat and simmer about 5 minutes or until ginger and pepper are soft. Remove from heat. With a slotted spoon, scoop pepper and ginger into a bowl for later. Reserve syrup.
3. In a shallow bowl (but large enough for all the tofu), whisk together soy sauce, 2 t reserved syrup, and lime juice. Add tofu, toss to coat, and set aside.
4. Add snow peas, oil and 1 T dressing to noodles, toss. Add cucumbers, tomatoes, tofu and chives to serving bowl.
5. Divide noodle salad among plates. Top with sliced avocado and sesame seeds.
Sunday, August 30, 2009
Arugula Salad and Honey Mustard Vinaigrette
Ingredients:
1 shallot, finely minced
1 t dijon mustard
2 t red wine vinegar
1/4 C extra-virgin olive oil
1 t sugar
1 t honey
salt and pepper
6 cups arugula
tomatoes, cucumbers, peppers if desired.
Mix the dressing together and toss with arugula just before serving.
Friday, August 28, 2009
100th Recipe! Another Twist on Mac & Cheese
Joey and I recently watched Tyler's Ultimate on the food network and were moved by his Ultimate Mac & Cheese with Bacon. Everything on his show is called "The Ultimate" but this really seemed special. We headed over to Costco for some cheap cheese in big packages. We chose Tilamook Vintage White Cheddar cheese which has a very extra sharp cheddar flavor. When buying the bacon for this recipe, it is important to buy bacon that is not too fatty to impart the particular flavors.
This recipe uses thyme as a flavoring, but recently we haven't been fans of thyme so we substituted basil (since we already had some). I think the thyme really might have added more. I thought this Mac & Cheese had a very earthy flavor but it just didn't seem cheesy enough to me. Joey, on the other hand, loved this dish when it came out of the oven.
Ingredients
- Kosher salt
- 1 pound elbow macaroni (cavatapi is the new macaroni in our house)
- 4 cups whole milk
- 2 or 3 sprigs thyme(we used 1 large bunch of basil)
- 4 cloves garlic, smashed and divided
- 3 tablespoons unsalted butter
- 3 tablespoons all-purpose flour
- 5 1/2 cups shredded sharp white Cheddar
- Freshly ground black pepper
- 1/4 cup chopped flat-leaf parsley
- 4 slices bacon, cut crosswise into thin strips (More Bacon!)
- 1 large onion, diced (we only used half an onion and that was plenty, I might use shallots next time)
- 2 garlic cloves, smashed
- Leaves from 1/4 bunch fresh thyme
Directions
Bring a pot of salted water to a boil over high heat. Add the macaroni and cook for 8 to 9 minutes, until al dente. Drain.
Preheat the oven to 400 degrees F.
In a small saucepan heat the milk with the thyme sprigs (we used basil) and 2 garlic cloves. Melt the butter in a large, deep skillet over medium-high heat. Whisk in the flour and cook for about 1 minute, stirring constantly, to keep lumps from forming.
Strain the solids out of the milk and whisk it into the butter and flour mixture. Continue to whisk vigorously, and cook until the mixture is nice and smooth.
Stir in the 4 cups of the cheese and continue to cook and stir to melt the cheese. Season with salt and pepper. Add the cooked macaroni and the parsley and fold that all in to coat the macaroni with the cheese mixture.
Scrape into a 3-quart baking dish and sprinkle with the remaining 1 1/2 cups cheese. Bake for 30 minutes, or until hot and bubbly.
While that bakes, heat a saute pan. Add the bacon, render the fat and cook until crispy. Add onion, garlic (while it says smash, we recommend dicing) and thyme leaves and cook for about 5 minutes to soften the onion. Season with salt and pepper.
To serve, scatter the bacon mixture over the mac and cheese. Use a big spoon to scoop out servings, making sure you get some of the smoking bacon mixture on each spoonful.
Thursday, August 27, 2009
Fresh Tomato Tart with Basil-Garlic Crust
I decided that it would be a smart idea to make the dough and the actual tart on different days. Pie crust (or in this case tart) is not my strongest subject. The dough, however, was pretty easy. However, they say it is ready when it forms a ball. This recipe calls for 4 T of water but mine formed a ball after only 2 T. Not knowing what to do, I added the additional water and my dough was somewhat of a sticky mess by the end. Probably I should've stopped at 2. After refrigeration, however, the dough was back to normal.
Rolling out the dough, also a weak subject, was really hard. Again the dough became a sticky mess. I ended up finally getting it by rolling the dough between two well floured pieces of plastic wrap and then getting in the tart pan.
This dish was absolutely fabulous when I tasted it after 5 minutes from the oven. The flavors highly depend on good tomatoes, but it is worth it. This is not enough for a full meal but would make a superb appetizer or bread side with roast chicken...or anything else really. After being in the refrigerator, the quality suffers a little but the flavors are still there. I recommend eating it all the first night.
Basil - Garlic Tart Dough
Ingredients:
1/3 C fresh basil
1 clove garlic
1 1/4 C flour
1/2 t salt
8 T unsalted butter, chilled, cut into 8 to 10 pieces
4-5 T ice water
Directions:
1. Process basil and garlic in a food processor until finely chopped. Add flour and salt and pulse to combine.
2. Add butter and pulse about 10 times until the mixture resembles pea-sized crumbs.
3. Add water 1 T at a time while pulsing until the mixture forms a ball
4. Flatten dough into a 5 inch disk. Wrap in plastic and refrigerate for at least an hour (I put my plastic-wrapped dough in a ziploc bag and refrigerated it for 3 days).
Fresh Tomato Tart
Ingredients:
1 recipe Basil-Garlic Tart Dough
8 oz sliced mozzarella
1 pound tomatoes, cored and cut crosswise into thin slices (I don't know how to core an heirloom tomato so I cut some in chunks, but the ones in slices were way prettier
Salt and pepper
1 T extra virgin olive oil
10 inch tart pan with removable bottom (my tart pan is 9.5 inches and worked fine)
Directions:
1. Butter the tart pan. Roll out dough into 12 inch circle and press into the tart pan, refrigerate if your kitchen is hot until needed.
2. Preheat oven to 375 degrees.
3. Line the bottom of the tart pan with cheese slices
4. Place a ring of tomatoes around the outside of the pan and another inner circle until all cheese is topped with tomatoes
5. Sprinkle with salt, pepper and oil
6. Bake until crust is golden brown (it looks a little green from the basil) and cheese is starting to brown--about 35-40 minutes. Cool for at least 5 minutes before serving
Tuesday, August 18, 2009
Quick Microwave Mac
Quick Microwave Mac
Ingredients:
Tupperware container
Microwave
leftover pasta noodles, any shape
1/4 C cubed cheese - I used Cheddar and Fontina
Fork
Directions:
1. Add cheese and pasta to a tupperware container, set lid on top diagonally but not closed allowing for air to escape
2. Microwave on high for 45 seconds. Stir with a fork, replace lid diagonally, and microwave an additional 10 seconds on high.
3. Remove from microwave, stir, and place lid on tupperware securly. Let sit for 2-3 minutes.
4. Eat!
Sunday, August 16, 2009
Late Night..er..Early Morning Pasta
Ingredients
- 1 pound pasta (I used half bowties and half curly macaroni)
- 4 slices bacon, cut into 1-inch strips
- 2 tablespoons olive oil (I think you could use less because of all the bacon grease)
- 2 tablespoons thinly sliced garlic
- 1 to 2 tablespoons chopped shallots
- 1/2 teaspoon crushed red pepper
- 1/2 teaspoon salt (again, I'd use less because of the bacon grease)
- 1 large egg
- Parmesan cheese for serving
Directions
1. Cook pasta to al dente according to box instructions. Reserve 1/4 C pasta water. Drain pasta and set aside.
2. Meanwhile, in a large skillet, heat the oil over medium heat. Add the bacon and cook until crisp. Add the garlic, shallots, pepper, and salt and cook, stirring, until fragrant and the garlic is soft but not brown, about 1 1/2 minutes.
3. Remove the pan from the heat and add the egg and reserved pasta cooking water, stirring quickly until the mixture thickens, but the egg does not scramble (our pan was really hot and so the egg scrambled, I recommend possibly cooling the pan a little bit first or perhaps adding the egg to the pasta water first).
4. Divide the pasta among bowls, sprinkle cheese to taste over the top of each serving, and serve immediately.
Sunday, August 9, 2009
Kona Coffee Ice Cream Pie
Joey basically made the pie himself. Meanwhile, I made baked beans.
Kona Coffee Ice Cream
Ingredients:
2 C half & half
6 T coffee beans (we used Kona)
4 large egg yolks
2/3 C sugar
1 C heavy whipping cream
Special Equipment: Ice cream maker
Directions:
1. In a double boiler, heat half and half and coffee beans over simmering water until steaming. Remove from heat and steep for 40 minutes.
2. In a bowl whisk the egg yolks until blended. Add sugar and whisk until combined.
3. Prepare a large ice bath that will hold the top of the double boiler pot.
4. Whisk half the hot half & half into the yolk mixture and then pour the whole mixture back into the pot and cook for about 10 minutes, stirring occasionally, until custard coats the back of a silicone spoon.
5. Remove from heat and place in an ice bath immediately, stirring occasionally, until the mixture reaches room temperature.
6. Strain through sieve into container (to remove beans), cover, and place in refrigerator to chill at least 3 hours.
7. Once the mixture is chilled, mix in ice cream maker according to manufacturers instructions, place in container and freeze.
Yield: 1 qt.
Oreo Cookie Crust
Ingredients
20 oreos
5 T butter
Directions:
1. Melt butter.
2. Mix melted butter and oreos. Press into a 9inch pie plate on the bottom and up the sides.
3. Place in refrigerator or freezer for later.
Hot Fudge
Ingredients:
6 oz bittersweet or semisweet chocolate, chopped or 1 cup chocolate chips
1/2 C half & half
1/4 C light corn syrup
1 t vanilla extract
1 T grand Marnier, brandy or cognac (optional)
Directions:
1. Combine chocolate, half & half, and corn syup over a double boiler and heat, stirring, until smooth.
2. Stir in vanilla and grand mariner, if desired. (we happened to have cognac on hand and put it in but we thought it smelled like alcohol and didn't love the flavor, we might use another fudge recipe next time).
3. Remove from heat and let cool slightly.
Ice Cream Pie Construction
Ingredients:
1 1/2 qts ice cream
1 recipe hot fudge
1 cookie crust
whipped cream in the can
Directions:
1. Remove pie crust from freezer. Spread with half the hot fudge. Freeze.
2. Remove ice cream from freezer and let soften so that it is spreadable.
3. Remove pie crust, spread ice cream on top of the hot fudge until it fully covers. If it starts to get too melty and moveable, Freeze for about 10 minutes.
4. Continue spreading ice cream until all the ice cream has been used or the pie looks full. Freeze.
5. Remove from freezer and top ice cream with a layer of hot fudge. Freeze.
6. Pipe whipped cream around the edges and one dollup in the center.
7. Freeze for at least an hour before serving.
Ok fine, here's a picture but it is terrible...it has melted, and been devoured and it doesn't look half as good as it did when we made it.
Sunday, August 2, 2009
Black Bean Tacos and more...
http://smittenkitchen.com/2009/02/crispy-black-bean-tacos-with-feta-and-slaw/
This economical and easy recipe was described by my son as "phenomenal". Next I plan to try the Spanish Chorizo and Asparagus.
Saturday, August 1, 2009
Broiled eggplant with crumbled feta
eggplant
olive oil
oregano
crumbled feta
Slice unpeeled eggplant into 1/4 inch slices. Place the slices on a paper towel and salt them. Let them drain for a half an hour. Transfer them to a baking pan and put olive oil on each side of the eggplant and sprinkle with oregano. Broil the eggplant and turn until it is tender. Add crumbled feta and broil again until the feta starts to brown.
Rustic Mac & Cheese
The one thing about mac & cheese is that people are always trying to add breadcrumb topping to give it a little crunch. But it isn't supposed to be crunchy! It should be velvety creamy pasta in the end. The other thing is that everyone wants to add several cheeses. But, do we really taste all those cheeses at once? Is it necessary?
This recipe called for Fontina. I was at the regular store and discovered the stuff to be a pricey $6 for 5 ounces. However, we were on a trip to Costco and discovered that 1 lb of Fontina was $6! What a savings. I had thinking maybe I should just substitute another cheese like white cheddar or mozzarella. After we tasted the fontina, we thought it tasted just like cheddar with a slight hint of swiss...so next time...
At the store I chose Campanelle shaped pasta. It is like a little flat piece of past rolled into a flower/cone shape (they are translated as Bells). We liked them because they were easy to fork and had that night ribbed texture on the side.
I received these rustic Italian caserolle dishes for my birthday a couple of years ago and have always thought they would be fun to use for something like this. I finally had my chance, the recipe called for a 9x13 pan but this was far more fun.
Oh and the Mac & Cheese? It was delicious! Creamy and velvety with a subtle hint of cheese flavor and light enough for an 80-degree day.
Rustic Mac & Cheese adapted from "The Complete Italian Vegetarian Cookbook"
Ingredients
8 oz shredded Fontina
1 C heavy cream
1 lb pasta, any small shape
pinch nutmeg
salt
4 T butter
Directions
Preheat oven to 350
1. Cook pasta in boiling water 2 minutes less than al dente according to package instructions.
2. While pasta is cooking, warm cream in microwave one minute and keep covered. Shred cheese. Grease baking dish (9x13).
3. Dice butter and place in a large bowl. Drain pasta and stir until coated with butter. Add cream and cheese. Stir until cheese starts to melt. Add nutmeg and salt to taste.
4. Pour pasta mixture into casserolle. Bake for 20 minutes until sauce is bubbling. Serve immediately.
Friday, July 31, 2009
Carnitas in the slow cooker
Our new strategy is sending Joey to the store on Monday where he picks up the cheapest cut of meat and then we figure out some recipe for it. This week's special was Pork Shoulder Boneless Country Style Short Ribs. It was 4lbs for $4, so we had a lot of meat. The meat is fatty and is supposed to be cooked a long time in order to make it delicious. We decided on Carnitas.
I searched the web for appropriate recipes and found 3. Joey helped me choose one of them. When we went to the store to get the remaining ingredients at 11:20pm before we were to cook the meat, however, we ran into a snag. Lard, which we had seen on the shelves plenty of times before was missing! We left the store disappointed with no game plan. I searched the web again and figured that we'd just use chicken broth based on the other recipes.
After 6 hours of cooking, the result was a fall-apart pork that I shredded. But it was bland and slightly dry too. We added some lime juice, some chili powder, some cumin. We drained the fat from the liquid...and yet, it still wasn't right.
I took a small handful of meat and tried frying it in some garlic butter--not bad but it just tasted like butter. Next time, I will try a different recipe or if I stuck with this one, I'd add a little butter.
Carnitas
3-4 lbs country style pork ribs (boneless) or pork butt
2 cinnamon sticks
3 bay leaves
3 large strips of orange peel
1 T Mexican Oregano (we have a Mexican section in the store and this was only 59 cents!)
1 t ground coriander (we crushed whole coriander in a pepper grinder)
1 lb lard (manteca), we substituted 3 C chicken broth
salt & pepper
1. Trim fat. Sprinkle pork with oregano, coriander, salt and pepper. Place in a large bowl with cinnamon, bay leaves, and orange rind and cover. Refrigerate overnight.
2. (melt lard). Make chicken broth from bullion cubes. Layer pork in slow cooker and cover with lard (chicken broth). Add the cinnamon, orange, and bay leaves.
*at this point, if I were you I would also add a couple of cloves of garlic, some chili powder, a little cumin, some lime juice or lime rind.*
3. Cook on low for 6 hours. Shred pork with two forks and enjoy.
4. We had the pork with tacos--that made it more delicious with all the salsa and the onions and cilantro--but it still needed something
Thursday, July 30, 2009
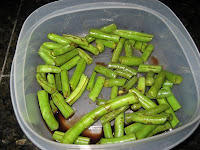
1 Bean Salad
As another attempt to use the leftover vegetables from Sunday's dinner, I decided to say goodbye to 3 beans and just keep one in my life. The green bean.
Basing my ideas off a traditional 3-bean salad, I created a mock-3-bean dressing by combining balsamic vinegar, a little sugar, salt and pepper and herbs de Provence. I cut the leftover green beans into one inch pieces and doused them with the dressing.
The beans sat in Tupperware in the fridge until Thursday and I had them for my afternoon snack. The slight sweetness and tang of the vinegar keep me from want cookies so I call this a success!
Tuesday, July 28, 2009
Sauteed Corn
My husband and I aren't good with leftovers. By the time we remember that we have them--or have the urge to eat them again, they are usually bad. Tonight, after boiling up some ears of corn we had the inevitable leftover pieces. Instead of letting them go to waste, I decided to saute them up and eat the corn as a side for my office lunches.
If you grew up with braces--you know how to cut corn from the cob. Stand the corn on the flat end (this my require you to break the cob in half). Using a sharp knife, cut closest to the narrow part of the kernals (toward the core) as possible avoiding the actual core. Cutting the kernels just in half will lose valuable sweetness from within the kernels.
Ingredients:
Leftover sweet corn, removed from cob
Chives
Salt
1 T Butter
In a small frying pan, heat 1 T salted butter over high heat. Add corn and break up with a spatula into smaller kernel families. Add chives and salt to taste. Saute 5 minutes until fragrant. Serve immediately or store in individual containers for easy snacking.
Monday, July 27, 2009
London Broil
I looked up several recipes online but in the end, I sort of made up my own. Somehow (probably the enticement of free food and little decision making) we convinced my father-in-law to grill the meat for us for dinner so I wouldn't have to turn on the broiler in this hot hot heat wave we're having.
This morning, I combined 187 ml of Cabernet (also known as red wine in case you were in the dark like me), 2 spoonfuls of prepared garlic (you can chop your own if you like), 1 T English Prime Rib rub, 3 grinds salt (I'm bad with salt), 7 peppercorns. I put the meat in a 9x13 pan and covered it in the wine-marinade. The marinade smelled horrible--and all day the smell worried me.
The meat marinated for about 7 hours. I turned it every time I remembered [:). The meat was grilled to medium rare for about 40 minutes.
Served with extra salt, the meat was delicious, if London broil was again $1/pound I would not hesitate to pick up a couple.
Sunday, June 14, 2009
New Product - Buffalo Mac & Cheese
We're always looking for the spice of life--in food. We like chicken wings. We like Mac & Cheese. How could it be bad together?
We bought the Mac & Cheese a long time ago, so its possible it isn't even available anymore, but I could be wrong. The box sat on the shelf for a long time before we decided to actually try it. My original excuse was that we didn't have any milk because milk is necessary for a good mac & cheese. However, tonight when we broke out the box it was discovered that this is a water + pasta + sauce packet only. No milk.
It took about 15 minutes to make the mac & cheese from start to finish.
Result: Buy Kraft if you want the nostalgia back...this stuff was spicy and wet...it didn't get that satisfying thickness of mac & cheese sauce. We didn't eat the whole thing. But seriously, if it says on the box to get rid of the leftovers immediately...how can it be good enough for consumers?
Saturday, June 13, 2009
Chicken Chilaquiles
Chicken Chilaquiles was a recipe I found on Dinner Tonight the Martha Stewart Everyday Food Blog. This recipe was fantastic and I highly recommend it. The most time consuming part is shredding the chicken, so if you have kids that want to help you if the chicken is cool enough I say go for it. Or you could do that earlier...the chicken is heated up so you don't have to keep it warm.
Ingredients
- 1 tablespoon olive oil
- 4 cloves garlic, chopped
- 1 can (28 ounces) whole peeled tomatoes in puree (or you could just get them pre-chopped)
- 2 canned chipotle chilies in adobo, finely chopped (about 1 heaping tablespoon), plus 1 tablespoon adobo sauce (from same can)
- Coarse salt
- 1 small cooked rotisserie chicken (about 1 3/4 pounds), skinned and shredded (about 4 cups), carcass discarded
- 1/2 cup lightly packed cilantro leaves, chopped, plus 4 sprigs for garnish
- 4 cups (about 3 ounces) tortilla chips
- 1/2 can pinto or black beans
- 1/4 cup reduced-fat sour cream
- Queso Fresco or Monterey Jack Cheese
Directions
- Combine oil and garlic in a large (3-to-4-quart) saucepan. Cook over medium heat, stirring occasionally, until fragrant and sizzling, 1 to 2 minutes.
- Add tomatoes with their puree (breaking tomatoes up), chipotles and adobo, and 1 cup water. Bring to a boil; season with salt. Reduce heat and simmer rapidly until lightly thickened, 6 to 8 minutes.
- Add chicken and beans and cook, stirring, until hot, about 1 minute. Remove from heat; stir in chopped cilantro.
- Divide chips among four shallow bowls; top with chicken mixture and sauce. Garnish with cilantro sprigs, sour cream, and cheese. Serve.
Friday, June 12, 2009
Cheese Ice Cream
Instead of going the watermelon route though, I decided to just make the ice cream. The ice cream was good with chocolate sauce, and is probably great with fruit--but by itself it is a little bit too gritty I think. But try it for yourself!
Cheese Ice Cream (I'm sure there is a better name for this)
Ingredients
1 15oz container cold whole milk ricotta (1 2/3 C)
3oz Cream Cheese
1 C cold whole milk
1 C sugar
2 T dark rum (you can buy little bottles at the liquor store)
1 t lemon zest
1/2 t vanilla
1/8 t salt
1/3 C heavy cream
Ice Cream Maker
Directions
1. Blend cheeses, milk, sugar, rum, zest, vanilla and salt in the blender until smooth, about 1 min (I used the food processor and it took about 30 seconds)
2. Add cream and blend until just combined, about 5 minutes (With the FP it took about 1 minute).
3. Freeze in the ice cream maker (it takes 20 minutes in ours usually but it was done in about 15). Freeze in an airtight container for 3 hours before serving (honestly you could serve it right away it was so thick and delicious).
Tip1 - The ice cream gets really cold and hard, leave it out before you serve it.
Tip2 - If you want to serve a Watermelon Sundae, cut slices one inch thick and serve ice cream next to the watermelon on a long plate, shave chocolate onto the ice cream.
Tip3 - I liked this ice cream with warm hot fudge which softened the ice cream
Saturday, June 6, 2009
Monterey Chicken
Joey landed on Monterey Chicken. He had had the recipe before and thought it was ok, so we decided to go ahead and make it. Monterey chicken is sort of an explosion of a lot of different flavors together. I can't say its my absolute favorite thing..but it wasn't bad. I think the part I found weird was the salsa topping with the bbq sauce. I don't usually eat bbq tacos...but its been done before.
We used a recipe from RecipeZaar with a few adjustments:
Ingredients:
- 4-6 boneless skinless chicken breasts
- 2-3 tablespoons butter (we omitted this)
- 8 slices bacon, cooked (not too crisp) - we didn't need this many
- 1/2 cup monterey jack cheese, shredded
- 1/2 cup cheddar cheese, shredded
- 1/2 cup bbq sauce
Salsa Topping (we just made a basic pico de gallo with cilantro, tomatoes, onion, lime juice and salt)
- 1 green bell pepper, diced small
- 1 onion, diced small (white or red)
- 1 tomato, diced small
- 3/4 cup white vinegar
- At least one hour or even a day ahead of time, make the Salsa Topping.
- Mix Salsa ingredients in a small bowl, chill.
- In a 13x9" baking dish, place the chicken, (not touching) and dot with Butter (if you don't dot it with butter it just won't brown which isn't a problem since you're covering the top anyway).
- Bake at 350° for 30-45 minutes, or until done.
- While chicken is cooking fry bacon and shred the cheeses.
- When chicken is fully cooked, remove from oven.
- Turn oven up to 425°F (*Unless you prefer the broiler).
- Spread the barbecue sauce on chicken, then the bacon and then add cheeses.
- Place the baking dish, back into the hot oven* or under the broiler for a few minutes until cheese is melted and bubbly, plate and top with the chilled Salsa Topping.
Friday, June 5, 2009
Arepa's
Recently 4 or 5 people, tv shows, and magazines mentioned Arepa's. This savory stuffed Latin American pancake was otherwise unknown to me--but after watching Bobby Flay compete for the best ones, I knew I had to make them.
I ended up settling on the first written recipe I found from Cookie magazine--a magazine geared towards parents that often contains recipes for simply, healthy foods that kids will eat. After looking at the picture in the magazine, and then looking at the ingredients to make sure they were husband-friendly, I decided to make them.
Unabe to find the main ingredient masarepa cornmeal in my regular grocery store, I commissioned Gavin to get it from the local Latin market near his house. He got the white masarepa cornmeal...it also comes in yellow which would probably look more like the original picture...but close enough.
Our final decision was that these were good enough to eat and not throw out, but they were a little bland (thank goodness for homemade pico de gallo!). There is so little filling compared to cake that you end up eating a ton of cake which is the part that isn't flavorful. I also have a suspiscion that my dough was too dry...because it was really hard to pack that filling. I'm going to get some tips from Joey's cousin who is the master Arepa cook.
Ingredients:
2 C precooked masarepa cornmeal
1 t salt
2 C hot chicken broth or water (I used 1 14 oz can of broth and 2 oz water)
1/2 C canned black or pinto beans, drained
1/2 C shredded jack cheese
Directions:
1. Combine cornmeal and salt in a bowl
2. Add hot broth and mix until a dough with no lumps form
3. Allow to cool slightly, then separate into 8 portions.
4. Dipping your hands in cold water, form dough into 8 balls
5. Poke a hole in each ball and fill with 1 t. beans and cheese (or more, whatever you can fit!), pinch the dough around the filling to close
6. Between your hands flatten the balls into 1 inch thick disks
7. Heat griddle or electric frying pan (I did the EFP to 375). Generously grease the pan with oil or butter
8. Cook until crispy on both sides (they say 3 minutes per side, I say more like 10-12 minutes total--just watch 'em)
9. Serve warm with pico de gallo