Showing posts with label dessert. Show all posts
Tuesday, February 27, 2018
Unicorn Yogurt Bark
We had some friends in town and Hazel was keen on making
this yogurt bark. What a cinch to put together! This is a recipe for eating right away or else it melts like yogurt, which is still good but half the fun is gone. I used some whole milk vanilla yogurt and some mixed berry greek yogurt and both turned out great. I think you could potentially skip the food coloring and just use lots of different colors of yogurt, but this was much more vibrant with the coloring.
Ingredients:
6 - 8 cups yogurt of your choice (I used 6 C vanilla & 1 C mixed berry), separated into bowls
Gel food coloring
sprinkles
Directions:
1. Prepare a sheet pan by lining it with parchment paper then make room in your freezer for the pan
2. Mix each cup of yogurt with a toothpick full of gel food coloring to desired color, I used yellow, green, blue, pink, purple and some maroon color
3. Spread yogurt on the prepared pan. Then swirl slightly with the back of a spoon or spatula to get the desired rainbow affect
4. Sprinkle on a variety of different sprinkles
5. Freeze 3-6 hours
6. Remove from the freezer and break into chunks like bark, you can easily do this with your hands. Serve immediately or freeze bark in a ziplock bag
Friday, September 15, 2017
Mini Raspberry Pies
Last week I bought some raspberries at Costco. Many of them were delicious and some of them were hard or weird (probably previously frozen?). Anyway, I didn't want to waste them so I decided to make some mini pies. As luck would have it, we also had a broken pie crust in the freezer!
I made up this recipe a little bit but I think I can recreate it for you here. The mini pies are pretty good, good enough to serve for an impromptu party. Delicious warm, okay cold - so maybe reheat for a few seconds before serving.
Ingredients
For the pies
1 Pie crust
1 1/2 Cups raspberries
Juice of one lemon
2 T tapioca
2-3 T sugar (depends on how sweet your berries are)
cooking spray
a little water
For the topping
2-3 T flour
3 T cold butter
2-3 T brown sugar
1/4 t ginger
1/4 t cinnamon
Directions
1. Preheat the oven to 350 and spray 8 muffin cups with cooking spray
2. Place raspberries in a bowl with lemon juice, sugar and tapioca. Stir and let sit until ready to use
3. Roll out the pie crust (add water if it is dry) on a floured surface and cut into 8 parts
4. Place one piece of dough in each prepared muffin cup and press up the sides
5. Make the topping and mix together with your hands until small peas
6. Distribute raspberry mixture among pies. Top with topping
7. Bake 15-20 minutes until golden brown around the edges
I made up this recipe a little bit but I think I can recreate it for you here. The mini pies are pretty good, good enough to serve for an impromptu party. Delicious warm, okay cold - so maybe reheat for a few seconds before serving.
Ingredients
For the pies
1 Pie crust
1 1/2 Cups raspberries
Juice of one lemon
2 T tapioca
2-3 T sugar (depends on how sweet your berries are)
cooking spray
a little water
For the topping
2-3 T flour
3 T cold butter
2-3 T brown sugar
1/4 t ginger
1/4 t cinnamon
Directions
1. Preheat the oven to 350 and spray 8 muffin cups with cooking spray
2. Place raspberries in a bowl with lemon juice, sugar and tapioca. Stir and let sit until ready to use
3. Roll out the pie crust (add water if it is dry) on a floured surface and cut into 8 parts
4. Place one piece of dough in each prepared muffin cup and press up the sides
5. Make the topping and mix together with your hands until small peas
6. Distribute raspberry mixture among pies. Top with topping
7. Bake 15-20 minutes until golden brown around the edges
Saturday, July 1, 2017
Jello Jigglers
Jello jigglers are a kid pleaser and so easy! I know jello is full of sugar but somehow I feel better about it than cake, for example. If you have for some reason never had jigglers, you are missing out and must make them right away!
Jello comes in so many colors you can adapt this to practically every holiday! Cookie cutters come in all shapes too!
Don't worry, is you forget the recipe, it is on the Jell-o brand boxes.
Ingredients
2 boxes (6oz each) Jello in a single flavor
2 1/2C boiling water
9x13 pan
Cookie cutters (small ones are best)
Directions
1. Stir the jello mix and boiling water until dissolved.
2. Pour into a 9x13 pan
3. Let set in the fridge at least 3 hours
4. Use a cookie cutter to cut out shapes or be boring and just cut squares.
5. Refrigerate until ready to serve
Jello comes in so many colors you can adapt this to practically every holiday! Cookie cutters come in all shapes too!
Don't worry, is you forget the recipe, it is on the Jell-o brand boxes.
Ingredients
2 boxes (6oz each) Jello in a single flavor
2 1/2C boiling water
9x13 pan
Cookie cutters (small ones are best)
Directions
1. Stir the jello mix and boiling water until dissolved.
2. Pour into a 9x13 pan
3. Let set in the fridge at least 3 hours
4. Use a cookie cutter to cut out shapes or be boring and just cut squares.
5. Refrigerate until ready to serve
Wednesday, April 12, 2017
CJ'S Chewy Chocolate Dream cookies.
Have you been craving the perfect chocolate cookie lately? Well, these cookies are bound to satisfy you. Eat them right out of the oven, frozen, plain, or in a bowl of ice cream. Whatever way you eat them, there is no hiding the incredible taste and flavor of these delicious chocolate cookies.
CJ's Chewy Chocolate Dream Cookies
1/2 cup Brown Sugar
1/2 cup White Sugar
1/2 cup Butter
1 Egg
1/2 teaspoon Vanilla
1 cup Flour
1/2 teaspoon Salt
1/2 teaspoon Baking Soda
2/3 cup chocolate chips (for melting)
1/2 cup chocolate chips ( If you want a crunch. If you don't want that, make it just 1 cup of chocolate chips.)
Preheat oven to 350 F
Cream in electric mixer butter, and both kinds of sugar. Add egg, mixing until combined, then put in vanilla. In a separate bowl, combine flour, baking soda, and salt. Very slowly, add the flour mix to the wet mix, and combine. Put a pot of water on to boil, then find a heatproof glass bowl (or use a double boiler). When the water is boiling, put the glass bowl on top of the pot and pour the 2/3 cup chocolate chips into the glass bowl. Stir until melted. After they are melted like this:
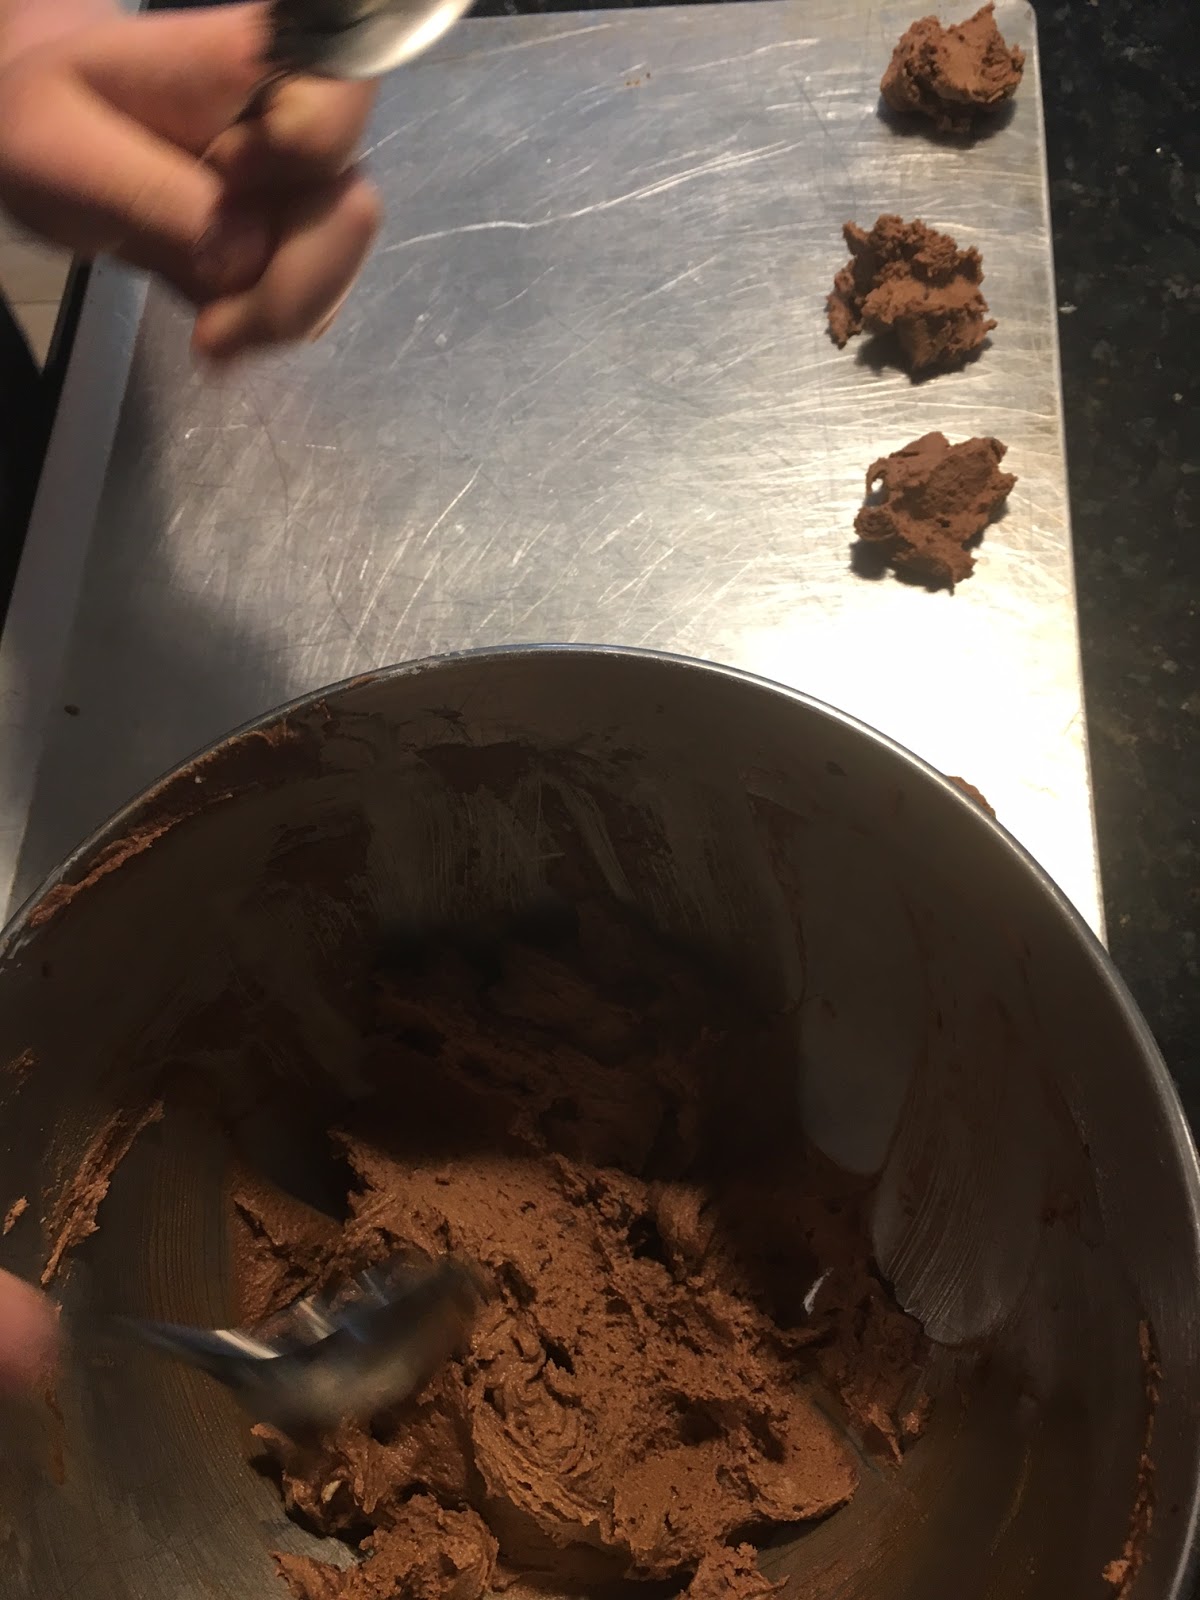
turn the stove off, and spoon the now melted chocolate chips into the mixer fast, so they don't harden. Turn the mixer on, and mix until combined. Mix in the rest of the chocolate chips. If you wish to add nuts, add a couple handfuls of chopped walnuts. Put onto trays:
and bake for first 8 minutes, then if they do not look done enough, bake for a minute more, and repeat until done. Serve as desired. Enjoy!
CJ's Chewy Chocolate Dream Cookies
1/2 cup Brown Sugar
1/2 cup White Sugar
1/2 cup Butter
1 Egg
1/2 teaspoon Vanilla
1 cup Flour
1/2 teaspoon Salt
1/2 teaspoon Baking Soda
2/3 cup chocolate chips (for melting)
1/2 cup chocolate chips ( If you want a crunch. If you don't want that, make it just 1 cup of chocolate chips.)
Preheat oven to 350 F
Cream in electric mixer butter, and both kinds of sugar. Add egg, mixing until combined, then put in vanilla. In a separate bowl, combine flour, baking soda, and salt. Very slowly, add the flour mix to the wet mix, and combine. Put a pot of water on to boil, then find a heatproof glass bowl (or use a double boiler). When the water is boiling, put the glass bowl on top of the pot and pour the 2/3 cup chocolate chips into the glass bowl. Stir until melted. After they are melted like this:
turn the stove off, and spoon the now melted chocolate chips into the mixer fast, so they don't harden. Turn the mixer on, and mix until combined. Mix in the rest of the chocolate chips. If you wish to add nuts, add a couple handfuls of chopped walnuts. Put onto trays:
and bake for first 8 minutes, then if they do not look done enough, bake for a minute more, and repeat until done. Serve as desired. Enjoy!
Tuesday, August 23, 2016
Plum Galette
Yesterday I wanted pie and I also wanted to use some plums that were waiting around looking sad. Having no real recipe, I searched for apricot galette thinking the plums were apricot. I found some basic ideas and made up a recipe. The results were delicious! This was quick and easy and you could whip it up in time for unexpected guests who think you were in the kitchen all day!
Ingredients:
4 plums, sliced
1 T cornstarch
1T sugar (could add more depending on sweetness of plums)
1T lemon juice
1/2 t cinnamon
1/4 t nutmeg
1 t almond extract (optional)
1 egg, beaten
1 sheet puff pastry, thawed (Mine didn't thaw all the way and the results were a bit doughy which actually I liked better)
Raw Sugar
Directions
1. Preheat the oven to 400
2. Stir all ingredients through almond extract together in a bowl and let sit 15 minutes
3. Place parchment paper on a cookie sheet or rimmed cookie sheet. Place the puff pastry on the middle of the tray and pinch the seams together
4. Pile the filling in the center of the dough and then fold up the sides to keep the juices inside, pinching the edges. Pour the excess juices from the bowl over the fruit stack.
5. Brush egg over the top of the galette. If desired, sprinkle with raw sugar.
6. Bake 20 minutes or until golden brown and a little bit bubbly
7. Let sit a few minutes before cutting
Ingredients:
4 plums, sliced
1 T cornstarch
1T sugar (could add more depending on sweetness of plums)
1T lemon juice
1/2 t cinnamon
1/4 t nutmeg
1 t almond extract (optional)
1 egg, beaten
1 sheet puff pastry, thawed (Mine didn't thaw all the way and the results were a bit doughy which actually I liked better)
Raw Sugar
Directions
1. Preheat the oven to 400
2. Stir all ingredients through almond extract together in a bowl and let sit 15 minutes
3. Place parchment paper on a cookie sheet or rimmed cookie sheet. Place the puff pastry on the middle of the tray and pinch the seams together
4. Pile the filling in the center of the dough and then fold up the sides to keep the juices inside, pinching the edges. Pour the excess juices from the bowl over the fruit stack.
5. Brush egg over the top of the galette. If desired, sprinkle with raw sugar.
6. Bake 20 minutes or until golden brown and a little bit bubbly
7. Let sit a few minutes before cutting
Friday, August 5, 2016
Grilled Donuts with ice cream and blueberry sauce
We had friends over a few weeks ago so we decided to go crazy and make this recipe for grilled donuts with ice cream and blueberry sauce we saw in Food & Wine earlier this summer as a very special treat.
The hardest part about this recipe is that you need to start with clean grill grates. If you are one of those people that clean the grill grates every time you cook then you are already set! We aren't that kind of people and it took my husband no less than half the day to clean our grates.
This recipe is delicious! It is most definitely rich, it is certainly not healthy but it's a really fun summertime treat!
Ingredients:
6 day-old glazed donuts, sliced in half
2 Tbls softened butter
vanilla ice cream, for serving
2 pints blueberries (4 cups)
1/2 cup Chambord or other raspberry liquoure (1 of the tiny containers at bevmo works)
1/3 cup sugar
Kosher salt
1 teaspoon fresh lemon juice
For the sauce:
1. Simmer 3 cups of blueberries, chambord, sugar and a pinch of salt over medium heat until blueberries begin to burst, about 15 min. Add the remaining blueberries and the lemon juice and keep warm if serving right away. Otherwise, this can be refrigerated and made ahead and then reheated slowly for serving.
2. Heat a gas grill to moderate heat. Butter donuts cut sides. Place buttered side down on the grates and grill 2-3 minutes or until lightly charred.
3. Serve donuts warm with blueberry sauce and vanilla ice cream
The hardest part about this recipe is that you need to start with clean grill grates. If you are one of those people that clean the grill grates every time you cook then you are already set! We aren't that kind of people and it took my husband no less than half the day to clean our grates.
This recipe is delicious! It is most definitely rich, it is certainly not healthy but it's a really fun summertime treat!
Ingredients:
6 day-old glazed donuts, sliced in half
2 Tbls softened butter
vanilla ice cream, for serving
2 pints blueberries (4 cups)
1/2 cup Chambord or other raspberry liquoure (1 of the tiny containers at bevmo works)
1/3 cup sugar
Kosher salt
1 teaspoon fresh lemon juice
For the sauce:
1. Simmer 3 cups of blueberries, chambord, sugar and a pinch of salt over medium heat until blueberries begin to burst, about 15 min. Add the remaining blueberries and the lemon juice and keep warm if serving right away. Otherwise, this can be refrigerated and made ahead and then reheated slowly for serving.
2. Heat a gas grill to moderate heat. Butter donuts cut sides. Place buttered side down on the grates and grill 2-3 minutes or until lightly charred.
3. Serve donuts warm with blueberry sauce and vanilla ice cream
Tuesday, August 25, 2015
Mug Brownie with Salted Caramel Ice Cream and Chocolate Espresso Drizzle
Sometimes you just want a brownie but you don't want to eat the entire pan and you want it in 3 minutes or less. THIS is your brownie!
I used No. 2 Pencil's recipe but since I used chocolate chips I didn't get the chocolate chunks they had.
I used this ice cream.
I used some of our 'chocolate espresso ripple' from our tiramisu ice cream. It is fantastic! We have been keeping it in one of those condiment containers so it comes out easily in a drizzle. Makes it look pretty fancy!
Hungry?
Sunday, December 21, 2014
Sticky Toffee Pudding

Have you ever had sticky toffee pudding? You can order it at Claim Jumper and in my opinion it is the best thing on the menu. This year, I decided to make sticky toffee pudding for our Smith Christmas celebration...and as you can see from the photo it was a HUGE hit! This is really not difficult to make but it does take a little time. It is so delicious you could eat it any day or you could save it for a big event but don't skip it. Do you hate dates? Yeah I mean who eats dates? I've never had them before but they make this cake absolutely amazing.
I did not vary from Smitten Kitchen's recipe at all but I am forever worried that someone's blog will be taken down and then I will no longer have the recipe and then...I just might cry.
Okay, well actually I varied it a tiny bit - I used Muscavado dark brown sugar for the sauce and we served this also with whipped cream AND ice cream and in my opinion the ice cream was the best. Seriously, make this tomorrow. And also you can find already pitted dried dates at Sprouts in a 3/4 lb package which, incidentally is EXACTLY what you need!
Cake
3/4 pound dried dates - get them pre pitted to save time
2 1/4 cups boiling water
1 1/2 teaspoons baking soda
8 tablespoons unsalted butter, melted
3/4 cup granulated sugar
2 tablespoons brown sugar
2 large eggs
1/4 teaspoon table salt
1 2/3 cups all-purpose flour
Butterscotch Sauce
8 tablespoons unsalted butter, melted
1 cup heavy whipping cream
1 cup plus 2 tablespoons brown sugar
2 teaspoons vanilla extract
To serve
Unsweetened whipped cream
Vanilla Ice Cream
Make the cake: Roughly chop dates and place them in a heatproof bowl. Pour boiling water over them and stir in the baking soda. Cover the bowl and set it aside for 30 minutes. (I covered it with a towel and it was fine)
Meanwhile, heat oven to 350°F. Butter a 9×13-inch baking pan. In a large bowl, combine the melted butter and sugars. Whisk in eggs, then salt. lend date-water mixture with an immersion blender until smooth. Stir in the flour, then date puree. Pour the batter into the prepared pan and bake for 25 to 30 minutes, until a toothpick inserted into the center comes out clean.
Make the sauce: Combine butter, cream, sugar and vanilla in a larger saucepan than you think you’ll need over medium heat and bring to a simmer. Whisk for about 10 minutes, until the mixture thickens slightly. If you have to reheat the sauce, the butter will be all separated. Bring it back up to a simmer and whisk for about 5 minutes until combined. Then, if you're serving buffet style, consider putting the sauce in a fondue pot or something because it hardens really fast. Also, this is a great chance to use really hard brown sugar because it melts!
To serve: Cut the cake into squares warm or cold. Drizzle each slice with toffee sauce and top with a dollop of whipped cream and/or ice cream.
Saturday, May 31, 2014
Best Caramel Sauce
Today for Jerry's birthday dessert we had brownie sundaes. Joey and I made the brownies and hot fudge from scratch and got some ice cream at our favorite ice cream shop. One of the brownie recipes called for a layer of caramel inside which required us to make our own caramel. Honestly, I think we didn't put enough caramel inside the brownies because I didn't notice it at all. However, we had a lot of leftover caramel so we served it as a sundae topping. Delicious! What I liked most about this caramel was the slightly salty flavor and the fact that it was pourable for the entire day! It tasted great on the sundaes!
Salted Caramel Sauce
1 C sugar
1/4 C water
2 Tablespoons light corn syrup
1/2 C heavy cream
1/4 C sour cream
1 tsp maldon sea salt
1. In a medium saucepan combine water, sugar and corn syrup over high heat. Stir but don't splatter the mixture on the sides. Cook 6-8 minutes until the sauce is a dark amber color and measures 350 degrees with a candy thermometer.
2. Remove from heat and slowly pour in the heavy cream while stirring. It may splatter. Add the salt.
3. Whisk in the sour cream and set aside to cool.
Salted Caramel Sauce
1 C sugar
1/4 C water
2 Tablespoons light corn syrup
1/2 C heavy cream
1/4 C sour cream
1 tsp maldon sea salt
1. In a medium saucepan combine water, sugar and corn syrup over high heat. Stir but don't splatter the mixture on the sides. Cook 6-8 minutes until the sauce is a dark amber color and measures 350 degrees with a candy thermometer.
2. Remove from heat and slowly pour in the heavy cream while stirring. It may splatter. Add the salt.
3. Whisk in the sour cream and set aside to cool.
Monday, October 14, 2013
Mini Caramel Apples
This past Sunday my parents were in town and we decided to visit the Hollywood Farmer's Market. This market is four streets large plus a spice alley and is always an adventure. While there, I spotted some tiny apples and I just knew I had to get them. After tasting them--slightly tart, crispy, still sweet, I bought the bag. I already knew I wanted to make mini caramel apples with them, I just had to navigate the timing of the day.
These caramel apples took no time at all! When looking for recipes lots of people complained that caramel takes too long to make from scratch. But do you know what takes a long time? Unwrapping those caramel candies! I hate those wrappers anyway, the grating sound of them, gross. But what is really easy is making caramel! And the flavor difference is night and day. My sister used to make caramels to give to people for gifts and this recipe was definitely the same (although I didn't know it at the time). This caramel just melts in your mouth and has that buttery touch of deliciousness. I made 12 tiny caramel apples and halved the original recipe.
Original recipe, mine halved below. I had a little extra caramel but we weren't sad to eat it ;)
Ingredients:
12 mini apples
3/8 + 1/8 cup heavy cream (divided)
3/8 cup light corn syrup
1/2 cup sugar
1/4 cup butter (I used salted)
1/2 t vanilla
chopped peanuts, optional
Special Equipment: Candy Thermometer, skewers or popsicle sticks
Directions
1. Wash and completely dry the apples. Chop nuts and place them in a flat bowl.
2. Poke sticks (I used these cake pop variety) into the top part of the apple near the stem. Push hard to make sure it is sturdy
3. Prepare a sheet pan lined with wax paper or parchment paper or a silicon mat.
4. In a heavy bottomed small pot (actually I just used a small pot), attach a candy themometer to the edge and combine butter, syrup, sugar and 3/8 C heavy cream over high heat.
5. Boil until temperature reaches 246 degrees, firm ball stage and remove from heat. Caramel will be golden, don't step away this hardly takes any time at all.
6. Stir in remaining 1/8 C heavy cream and vanilla. This will spurt and splatter, protect yourself!
7. Carefully dip apples and spoon caramel over. Let excess drip off, swirl into nuts if using and then place in the prepared pan. Work quickly because the caramel will start to get more solid and be harder to use.
8. Refrigerate and the caramel will harden so that it is easier to get it off the pan. Serve.
Original recipe, mine halved below. I had a little extra caramel but we weren't sad to eat it ;)
Ingredients:
12 mini apples
3/8 + 1/8 cup heavy cream (divided)
3/8 cup light corn syrup
1/2 cup sugar
1/4 cup butter (I used salted)
1/2 t vanilla
chopped peanuts, optional
Special Equipment: Candy Thermometer, skewers or popsicle sticks
Directions
1. Wash and completely dry the apples. Chop nuts and place them in a flat bowl.
2. Poke sticks (I used these cake pop variety) into the top part of the apple near the stem. Push hard to make sure it is sturdy
3. Prepare a sheet pan lined with wax paper or parchment paper or a silicon mat.
4. In a heavy bottomed small pot (actually I just used a small pot), attach a candy themometer to the edge and combine butter, syrup, sugar and 3/8 C heavy cream over high heat.
5. Boil until temperature reaches 246 degrees, firm ball stage and remove from heat. Caramel will be golden, don't step away this hardly takes any time at all.
6. Stir in remaining 1/8 C heavy cream and vanilla. This will spurt and splatter, protect yourself!
7. Carefully dip apples and spoon caramel over. Let excess drip off, swirl into nuts if using and then place in the prepared pan. Work quickly because the caramel will start to get more solid and be harder to use.
8. Refrigerate and the caramel will harden so that it is easier to get it off the pan. Serve.
Saturday, July 6, 2013
S'mores Pie
I love s'mores and I have been really wanting to make s'mores ice cream but by the time I got up on this holiday there wasn't enough time to get going on the ice cream and have it ready for dinner. So I browsed for different options around the web. I found this take on s'mores which uses a graham cracker crust, brownies and toasted marshmallows. This dessert was incredibly rich and I thought delicious, although, I sort of wish I had it right out of the oven instead of at room temperature.
If you like brownies, you should try this recipe without all the additions because these brownies were fast, one bowl and super easy.
If you make this...consider using regular unsweetened cocoa vs. dutch process (woah, dark chocolate)
If you make this...consider serving it hot!
If you make this...don't leave while the broiler is on and watch those marshmallows like a hawk. Once they start to get brown pull it out.
If you make this...make your own graham cracker crust.
Here's the recipe for when you make this...
If you like brownies, you should try this recipe without all the additions because these brownies were fast, one bowl and super easy.
If you make this...consider using regular unsweetened cocoa vs. dutch process (woah, dark chocolate)
If you make this...consider serving it hot!
If you make this...don't leave while the broiler is on and watch those marshmallows like a hawk. Once they start to get brown pull it out.
If you make this...make your own graham cracker crust.
Here's the recipe for when you make this...
Thursday, July 4, 2013
Summer Stone Fruit Tart
Joey loves apricots and peaches and plums but is unfortunately allergic to them in their raw state. So, when summer comes around and stone fruit is all the rage, I do everything I can to get some on his plate. Last week, I grilled a peach--it was interesting but I didn't flavor it. Next time I would treat it more like a baked apple.
On Wednesday I worked from home and used that opportunity to make a stone fruit tart with all the fruit that was a tiny bit overripe and waiting for me to eat.
I started off the morning making a simple quick easy tart dough recipe that I found on Williams Sonoma. I changed it a little so it tasted a little bit like almond--a favorite flavor at our house. This recipe didn't come together as easily as I had hoped and was a real bear to roll out in the evening but the taste was good...so use at your own risk!
Summer Stone Fruit Tart
Crust adapted from here
1 egg yolk
2-4 T ice water
1/2 tsp vanilla
1/2 tsp almond extract
2 T almond meal
1 1/4 C flour
1/3 C sugar
1/4 t salt
8 T butter cubed and cold
1. In a large bowl mix together all the dry ingredients. In a small bowl mix together the egg, 2 T water and extracts.
2. Combine together the dry and wet ingredients in the large bowl and then cut in the butter with a pastry cutter to form small pea meal. IF it seems to dry gradually add a little bit more water at a time.
3. Just as the dough comes together, form into a ball and then flatten inside plastic wrap. Chill for 3 hours at minimum.
Filling
8-10 small apricots, sliced into wedges
2 peaches, sliced into wedges
1 plum, sliced into wedges
1/4 C sugar (or less)
1/4 t nutmeg
1/4 t cinnamon
1/4 lemon, juiced
2 T cornstarch
1. Combine all ingredients in a bowl and lightly toss about 10 minutes before baking.
The Combination
1. Roll out the dough between two sheets of well-flowered parchment into around a 12-inch circle. Place on a rimmed baking sheet and chill for 30 minutes.
2. Preheat the oven to 325
3. Remove the top sheet of parchment. Mound fruit in the center leaving at least two inches of dough around the sides, avoid adding excess juices
4. Brush the fruit and crust with some of the excess juice
5. Bake 30 minutes, brush with juice, bake 30 more minutes, brush with juice.
6. Let cool 10-15 minutes before even considering cutting into it. Serve warm or cold, still good the next day!
Sunday, December 23, 2012
The Pioneer Woman's Blackberry Cobbler
Last year, I made this cobbler with raspberries, and I just don't think it really worked. This time, I made it again in this other pan and I think it worked way better. In fact, it was a total success! Instead of last time using a 9x13 pan, I used this thing...which is...uh 9x9? I have no idea, it's probably around there and it was so easy!
Despite having to buy self-rising flour this 5 ingredient dish is easy enough to whip up at the last minute for company and delicious enough to eat for breakfast!
Blackberry Cobbler
1 stick butter (1/2 C), melted
1 1/4 C sugar, divided
1 C self-rising flour
1 C milk
2 C blackberries (fresh or frozen)
Directions
Preheat the oven to 350
1. Melt the butter
2. Whisk together flour and 1 C of sugar until combined
3. Add milk and whisk until combined.
4. Add butter and whisk until combined.
5. BUTTER your dish
6. Pour batter into the dish and dot with blackberries. Sprinkle with remaining 1/4 C - 1 T of sugar (I didn't use all of this)
7. Bake for 50 minutes, then sprinkle 1 T sugar on top of the cobbler. Bake an additional 10 minutes until golden and bubbly (with my thicker pan we actually baked it about 15 more minutes until it was actually golden)
I wish we ate this warm....
Despite having to buy self-rising flour this 5 ingredient dish is easy enough to whip up at the last minute for company and delicious enough to eat for breakfast!
Blackberry Cobbler
1 stick butter (1/2 C), melted
1 1/4 C sugar, divided
1 C self-rising flour
1 C milk
2 C blackberries (fresh or frozen)
Directions
Preheat the oven to 350
1. Melt the butter
2. Whisk together flour and 1 C of sugar until combined
3. Add milk and whisk until combined.
4. Add butter and whisk until combined.
5. BUTTER your dish
6. Pour batter into the dish and dot with blackberries. Sprinkle with remaining 1/4 C - 1 T of sugar (I didn't use all of this)
7. Bake for 50 minutes, then sprinkle 1 T sugar on top of the cobbler. Bake an additional 10 minutes until golden and bubbly (with my thicker pan we actually baked it about 15 more minutes until it was actually golden)
I wish we ate this warm....
Sunday, November 4, 2012
(Joseph Conrad) Heart of Darkness Brownies
For my wedding, I received a cookbook called "Sticky, Chewy, Messy, Gooey." Unfortunately, I've only ever made a handful of recipes from it because generally when we have people over Joey takes part in the dessert preparation and leans toward exotic pies and tarts. But this time I stood firm on wanting something chocolatey.
These (Joseph Conrad) Heart of Darkness brownies are so rich that while the recipe makes 24, your guests will only be having one. They are that rich.
These brownies combine regular brownie batter with snickers, chocolate chips, marshmallows, caramel drizzle and an option of toasted nuts. And they remain moist and a little bit gooey in the center.
It seems like a lot of steps to take but these brownies aren't as difficult as you might assume. The hardest part is unwrapping all the candy! Don't make these if you are dieting. Do make these if you need to use up extra halloween candy. I think you could easily swap in another candy like milky ways or twix bars or even peanut butter cups.
Before you scoff at the ingredients remember this makes over 24 regular sized muffin cup brownies. We made a small ramekin extra.
For brownies:
3 Sticks unsalted butter
6 oz unsweetened chocolate
2 1/4 Cups sugar
1 C brown sugar
6 eggs, lightly beaten
1 T vanilla extract
1 1/2 C flour
1/2 t salt
1 C semisweet chocolate chips
5 full size (2.07 oz each ) snickers bars, or half a regular sized funsize bag, chopped into chunky bits
3 C mini marshmallows
1 C coursely chopped toasted almonds or pecans (optional)
For Caramel Sauce:
6 oz unwrapped caramel candies (such as craft brand)
2 T heavy cream
1 t vanilla extract
pinch of salt
Directions:
Preheat the oven to 350 and spray two muffin tins with nonstick cooking spray. Set aside.
1. Melt the butter and unsweetened chocolate in a pan over med-low and stir til smooth
2. Pour chocolate mixture into a bowl and add sugars, eggs and vanilla. Stir to combine.
3. Add the flour and salt and stir just til combined
4. Add the nuts if using, chocolate chips, and snickers bars and stir until just combined
5. Fill the muffin cups half full and bake for about 20 minutes until the surface is glossy and cracked.
6. Remove from oven and top with marshmallows
7. Return to oven and bake 2 minutes more so marshmallows are lightly puffed
8. Set aside on racks to cool for about 10 minutes
9. After 10 minutes, remove brownies from tins and set to cool completely on racks
10. When brownies are cool, combine all the caramel ingredients in a microwave-safe bowl and heat on high 1 minute. Add 30 seconds until the caramels are melted. Stir to combine and then drizzle over brownies
11. Let the caramel cool and harden, then serve or store in an airtight container
These (Joseph Conrad) Heart of Darkness brownies are so rich that while the recipe makes 24, your guests will only be having one. They are that rich.
These brownies combine regular brownie batter with snickers, chocolate chips, marshmallows, caramel drizzle and an option of toasted nuts. And they remain moist and a little bit gooey in the center.
It seems like a lot of steps to take but these brownies aren't as difficult as you might assume. The hardest part is unwrapping all the candy! Don't make these if you are dieting. Do make these if you need to use up extra halloween candy. I think you could easily swap in another candy like milky ways or twix bars or even peanut butter cups.
Before you scoff at the ingredients remember this makes over 24 regular sized muffin cup brownies. We made a small ramekin extra.
For brownies:
3 Sticks unsalted butter
6 oz unsweetened chocolate
2 1/4 Cups sugar
1 C brown sugar
6 eggs, lightly beaten
1 T vanilla extract
1 1/2 C flour
1/2 t salt
1 C semisweet chocolate chips
5 full size (2.07 oz each ) snickers bars, or half a regular sized funsize bag, chopped into chunky bits
3 C mini marshmallows
1 C coursely chopped toasted almonds or pecans (optional)
For Caramel Sauce:
6 oz unwrapped caramel candies (such as craft brand)
2 T heavy cream
1 t vanilla extract
pinch of salt
Directions:
Preheat the oven to 350 and spray two muffin tins with nonstick cooking spray. Set aside.
1. Melt the butter and unsweetened chocolate in a pan over med-low and stir til smooth
2. Pour chocolate mixture into a bowl and add sugars, eggs and vanilla. Stir to combine.
3. Add the flour and salt and stir just til combined
4. Add the nuts if using, chocolate chips, and snickers bars and stir until just combined
5. Fill the muffin cups half full and bake for about 20 minutes until the surface is glossy and cracked.
6. Remove from oven and top with marshmallows
7. Return to oven and bake 2 minutes more so marshmallows are lightly puffed
8. Set aside on racks to cool for about 10 minutes
9. After 10 minutes, remove brownies from tins and set to cool completely on racks
10. When brownies are cool, combine all the caramel ingredients in a microwave-safe bowl and heat on high 1 minute. Add 30 seconds until the caramels are melted. Stir to combine and then drizzle over brownies
11. Let the caramel cool and harden, then serve or store in an airtight container
Tuesday, October 2, 2012
A play on Monkey Bread
Tonight I made some buttermilk biscuits but I used the smaller biscuit cutter and made way too many. In order to make a slightly less amount of too many biscuits for two, I decided to mix some sauteed cinnamon apples with the scraps and bake it in the oven.
This is not unlike Monkey Bread. This is a lot like a certain recipe I remember seeing on Tastespotting early last week. But I didn't follow any recipe, I just put it together. It took 8 minute to bake and maybe it could've gone a bit longer. I think this is a fantastic "Welcome Fall" dessert. If you are living anywhere besides Southern CA you might actual have met Autumn on September 22nd. But if you live here in Los Angeles, you are planning to put some shorts on tomorrow and zip from the car to the ice cold office to avoid 102 degrees on OCTOBER first...
This is a quick dessert if you already have the apples and biscuit dough made. This is a slightly less quick dessert if you don't. This made enough for two.
Apple Biscuit "Cobbler"
Ingredients:
1/2 C sauteed cinnamon apples (recipe below)
1/2 C leftover biscuit pieces or 3 canned biscuits
cinnamon
nutmeg
baking spice
3 T sugar
1 T butter
Directions:
1. In a small bowl mix sugar, cinnamon, nutmeg and baking spice. If you sliced the apples, cut them into smaller bits
2. Layer biscuits and apples in a small ramekin, ending with more biscuit than apples
3. Melt butter and pour over the ramekin
4. Bake at 450 degrees for 9 minutes
5. Let cool at least 10 minutes before digging in!
Sauteed Cinnamon Apples
Ingredients:
4 medium apples, two red, two green, peeled and thinly sliced or cubed
cinnamon
1/4 C brown sugar
1 T butter
Directions:
1. In a small frying pan, melt butter over medium heat
2. Toss apples with cinnamon and sugar (I actually used a ton more sugar but I highly dissuade you from doing this because it was too much sugar)
3. Saute apples for about 8 minutes until tender and a little syrup forms, serve as a side or a dessert
This is not unlike Monkey Bread. This is a lot like a certain recipe I remember seeing on Tastespotting early last week. But I didn't follow any recipe, I just put it together. It took 8 minute to bake and maybe it could've gone a bit longer. I think this is a fantastic "Welcome Fall" dessert. If you are living anywhere besides Southern CA you might actual have met Autumn on September 22nd. But if you live here in Los Angeles, you are planning to put some shorts on tomorrow and zip from the car to the ice cold office to avoid 102 degrees on OCTOBER first...
This is a quick dessert if you already have the apples and biscuit dough made. This is a slightly less quick dessert if you don't. This made enough for two.
Apple Biscuit "Cobbler"
Ingredients:
1/2 C sauteed cinnamon apples (recipe below)
1/2 C leftover biscuit pieces or 3 canned biscuits
cinnamon
nutmeg
baking spice
3 T sugar
1 T butter
Directions:
1. In a small bowl mix sugar, cinnamon, nutmeg and baking spice. If you sliced the apples, cut them into smaller bits
2. Layer biscuits and apples in a small ramekin, ending with more biscuit than apples
3. Melt butter and pour over the ramekin
4. Bake at 450 degrees for 9 minutes
5. Let cool at least 10 minutes before digging in!
Sauteed Cinnamon Apples
Ingredients:
4 medium apples, two red, two green, peeled and thinly sliced or cubed
cinnamon
1/4 C brown sugar
1 T butter
Directions:
1. In a small frying pan, melt butter over medium heat
2. Toss apples with cinnamon and sugar (I actually used a ton more sugar but I highly dissuade you from doing this because it was too much sugar)
3. Saute apples for about 8 minutes until tender and a little syrup forms, serve as a side or a dessert
Friday, July 6, 2012
Poached Apricots
These apricots were absolutely fantastic! I loved the flavors that soaked into the fruit, I loved the texture, I loved how they tasted with ice cream, I loved them warm, I loved them room temperature, I think I would love them cold. I think I will make these all summer and maybe try it with other stone fruit!
The caramel sauce that I was supposed to make by reducing the liquid just didn't turn out...it burned, it became one solid piece of dark dark brown candy that was gross looking. It made our house smell disgusting. It was totally my fault, I didn't want to stand there watching it. I bet the sauce would've been as delicious as the apricots. I served a little goat's milk caramel sauce with ours instead but it totally wasn't necessary. Do yourself a favor and poach some fruit today!
I halved the recipe because I only had 10oz of apricots. My apricots were maybe a tad on the too-ripe side for this recipe. I bought them and then delayed in making them because we decided we'd pair them with homemade vanilla bean ice cream. When we finally made the ice cream, the apricots were READY. By the time I had time to make them, I'd already lost two and had to put them in the fridge.
Ingredients
1/8 C honey
3/4 C sugar (I used vanilla sugar because we just made some with our leftover vanilla bean from the ice cream, it might have added something)
3/4 C water
scant handful of basil (we're growing our own!)
10oz apricots
vanilla ice cream
Directions
1. Combine honey, sugar, basil and water in a medium saucepan and bring to a boil over high heat. (this will be fast)
2. Slice apricots in half and remove pits and stems.
3. Reduce heat to medium high and add apricots. Poach 2-4 minutes until soft but still intact
4. Remove fruit to a plate to cool
5. This is where you should read the directions again over on WoRC's blog and try to make the reduction. Since it didn't work for me my only advice is WATCH IT THE WHOLE TIME.
6. Serve the apricots over ice cream and lick the plate clean of the best simple syrup you've ever had.
Friday, May 11, 2012
Strawberry Shortcake Puffs
2 sheets frozen puff pastry, thawed (you can do this overnight in the refrigerator or in 40 minutes on the counter)
8 strawberries, sliced into triangle wedges
1 C heavy whipping cream
1 T powdered sugar
1 t vanilla extract
Sugar in the raw
1. Preheat the oven according to the directions on the frozen puff pastry package--I think it is 425?
2. Spread the sheets flat on the counter and cut out small circles of dough and place on a parchment lined baking sheet
3. Bake 15 minutes or until pastry is puffed
4. Meanwhile, beat cream and sugar together until stiff peaks form, beat in vanilla
5. When the pastries are slightly cool top with a dollop of whipped cream and a strawberry slice.
6. Refrigerate until ready to eat
7. Just before serving, top with sugar in the raw
Cuisine:
dessert
Monday, December 19, 2011
Chocolate Bread Pudding
A couple of days ago we bought some Italian bread to take to an appetizer party along with our sourdough bread snowman and chimahurri sauce. But then just before we were about to leave we found out that there would only be 20 people in attendance and we did not need to bring too much food. So the bread was left to waste away on the counter.
A day or so later I decided the bread needed to be made. So I searched recipes for bread pudding which is what one typically does with day-old bread. I wanted to make our recipe for pumpkin bread pudding that we did for Thanksgiving Testing 2011 but I didn't have pumpkin on hand and it wasn't time for shopping.
I ended up making a variety of Chocolate Bread Pudding from a recipe on Real Simple. I had all the ingredients but I had to cheat a little on the types of chocolate I used--I didn't have enough squares of semi sweet available. I actually skimped on the chocolate and it was still enough. I wish that this recipe had a dash of cinnamon or something to round out the flavor.
I also skimped on the soaking time and the weighing down the bread. I did this because I decided to make the dish at 8pm and didn't really want it around the next day. I brought the dish to work. It was completely gone by 5pm. I think that's a sign of either a good dish or a compelling idea that people though sounded good, tasted, and threw away. But I'll never know!
You should make this but follow the directions for soaking. Since I didn't I found that the middle of the bread was still white (it should be brown and covered in chocolate). I also found chocolate crusts on the top of the bread--as though I melted chocolate, let it harden, and spread it on top. On the other hand, the dish was still good so do whatever you want if you make it. I think I prefer bread pudding that isn't chocolate--believe it or not.
Wednesday, December 7, 2011
New Product: Cookie Butter
One of my friends pointed me to one of our daily reads today and an article describing the delectable products Trader Joe's brought out this year for the holiday season.
Sure there are lots of products in the article that call out to me but the most significant is Cookie Butter. Cookie Butter?! My friend and I couldn't imagine how it couldn't be wonderful combining two things we love most--butter and cookies into one delicious spread.
I knew I had to have it. I don't like Trader Joe's. I go there and have to deal with tight parking lots, tight aisles and can never find anything I want with their crazy store organization. But I was resigned to give it a try anyway because I couldn't pass up a chance to try the famed Cookie Butter. I went there after work and actually discovered a store with more than one open space in the parking lot and rather roomy aisles. Hurrah!
As I was driving home after buying what one can only refer to as a grocery bag of the before-dinner munchies, my aforementioned friend texted me with a message that the cookie butter is amazing. She encouraged me to crack the jar in the car. Sadly it was stuffed in the back seat amongst boxes of un-needed snacks near the bottom of the bag. I counted down the minutes to the garage and rushed upstairs to prepare dinner and sample the butter.
Glorious! The texture of peanut butter the flavor of gingersnaps with a tiny bit of crunch from the smashed up cookies. This butter is terrible for you with 9g of fat per every 1 T but it would be delicious in a myriad of holiday sweets. For instance just today I saw a recipe for chocolate cookies stuffed with peanut butter--but they would be great with Cookie Butter instead. Or spread on toast with maybe a tiny dash of sea salt. Or spread onto cupcakes as a frosting.
Will I eat the whole jar without making a recipe? Doubtful. Could I? Very possibly. But I'll share instead!
Sure there are lots of products in the article that call out to me but the most significant is Cookie Butter. Cookie Butter?! My friend and I couldn't imagine how it couldn't be wonderful combining two things we love most--butter and cookies into one delicious spread.
I knew I had to have it. I don't like Trader Joe's. I go there and have to deal with tight parking lots, tight aisles and can never find anything I want with their crazy store organization. But I was resigned to give it a try anyway because I couldn't pass up a chance to try the famed Cookie Butter. I went there after work and actually discovered a store with more than one open space in the parking lot and rather roomy aisles. Hurrah!
As I was driving home after buying what one can only refer to as a grocery bag of the before-dinner munchies, my aforementioned friend texted me with a message that the cookie butter is amazing. She encouraged me to crack the jar in the car. Sadly it was stuffed in the back seat amongst boxes of un-needed snacks near the bottom of the bag. I counted down the minutes to the garage and rushed upstairs to prepare dinner and sample the butter.
Glorious! The texture of peanut butter the flavor of gingersnaps with a tiny bit of crunch from the smashed up cookies. This butter is terrible for you with 9g of fat per every 1 T but it would be delicious in a myriad of holiday sweets. For instance just today I saw a recipe for chocolate cookies stuffed with peanut butter--but they would be great with Cookie Butter instead. Or spread on toast with maybe a tiny dash of sea salt. Or spread onto cupcakes as a frosting.
Will I eat the whole jar without making a recipe? Doubtful. Could I? Very possibly. But I'll share instead!
Saturday, November 12, 2011
Pumpkin Bread Pudding
But if you're having a small autumn dinner party or you just want to make a weeknight dessert this is for you--assuming you like both pumpkin and bread pudding.
The biggest snag in this recipe is that you have to plan ahead a little bit and buy the bread a day before--or if your bread at your local grocery is as fresh as ours you might want to try two days. Or maybe you can toast your bread a little in the oven or in a dry pot on the stove before using it in the dessert. For us, our bread wasn't as crisp as we would have liked.
You only need 1 french baguette for this recipe. We didn't have allspice so we just substituted a bit of nutmeg.
Ingredients
1 cup heavy cream
3/4 cup canned solid-pack pumpkin
1/2 cup whole milk
1/2 cup sugar
2 large eggs plus 1 yolk
1/4 teaspoon salt
1/2 teaspoon ground cinnamon
1/4 teaspoon ground ginger
1/8 teaspoon ground allspice
Pinch of ground cloves
5 cups cubed (1-inch) day-old baguette or crusty bread
3/4 stick unsalted butter, melted
Directions
Preheat oven to 350°F with rack in middle.
Whisk together cream, pumpkin, milk, sugar, eggs, yolk, salt, and spices in a bowl.
Toss bread cubes with butter in another bowl, then add pumpkin mixture and toss to coat. Transfer to an ungreased 8-inch square baking dish and bake until custard is set, 25 to 30 minutes.
1 cup heavy cream
3/4 cup canned solid-pack pumpkin
1/2 cup whole milk
1/2 cup sugar
2 large eggs plus 1 yolk
1/4 teaspoon salt
1/2 teaspoon ground cinnamon
1/4 teaspoon ground ginger
1/8 teaspoon ground allspice
Pinch of ground cloves
5 cups cubed (1-inch) day-old baguette or crusty bread
3/4 stick unsalted butter, melted
Directions
Preheat oven to 350°F with rack in middle.
Whisk together cream, pumpkin, milk, sugar, eggs, yolk, salt, and spices in a bowl.
Toss bread cubes with butter in another bowl, then add pumpkin mixture and toss to coat. Transfer to an ungreased 8-inch square baking dish and bake until custard is set, 25 to 30 minutes.
Subscribe to:
Posts (Atom)